Creating the backend of my website with Node.js & MongoDB
After I created my frontend content ( see the article [Creating the frontend of my website with Github Page]), I decided to add a commenting function for more audience interaction, and also thought this would be an amazing idea to practice backend creation. ( According to some of the definitions I have read, I guess this makes my website dynamic? Let me know if you think it is not. I understand the comment function is very basic for a dynamic websites compared with website like Amzon or Tripadvisor, etc.)
Without further ado, let’s go!
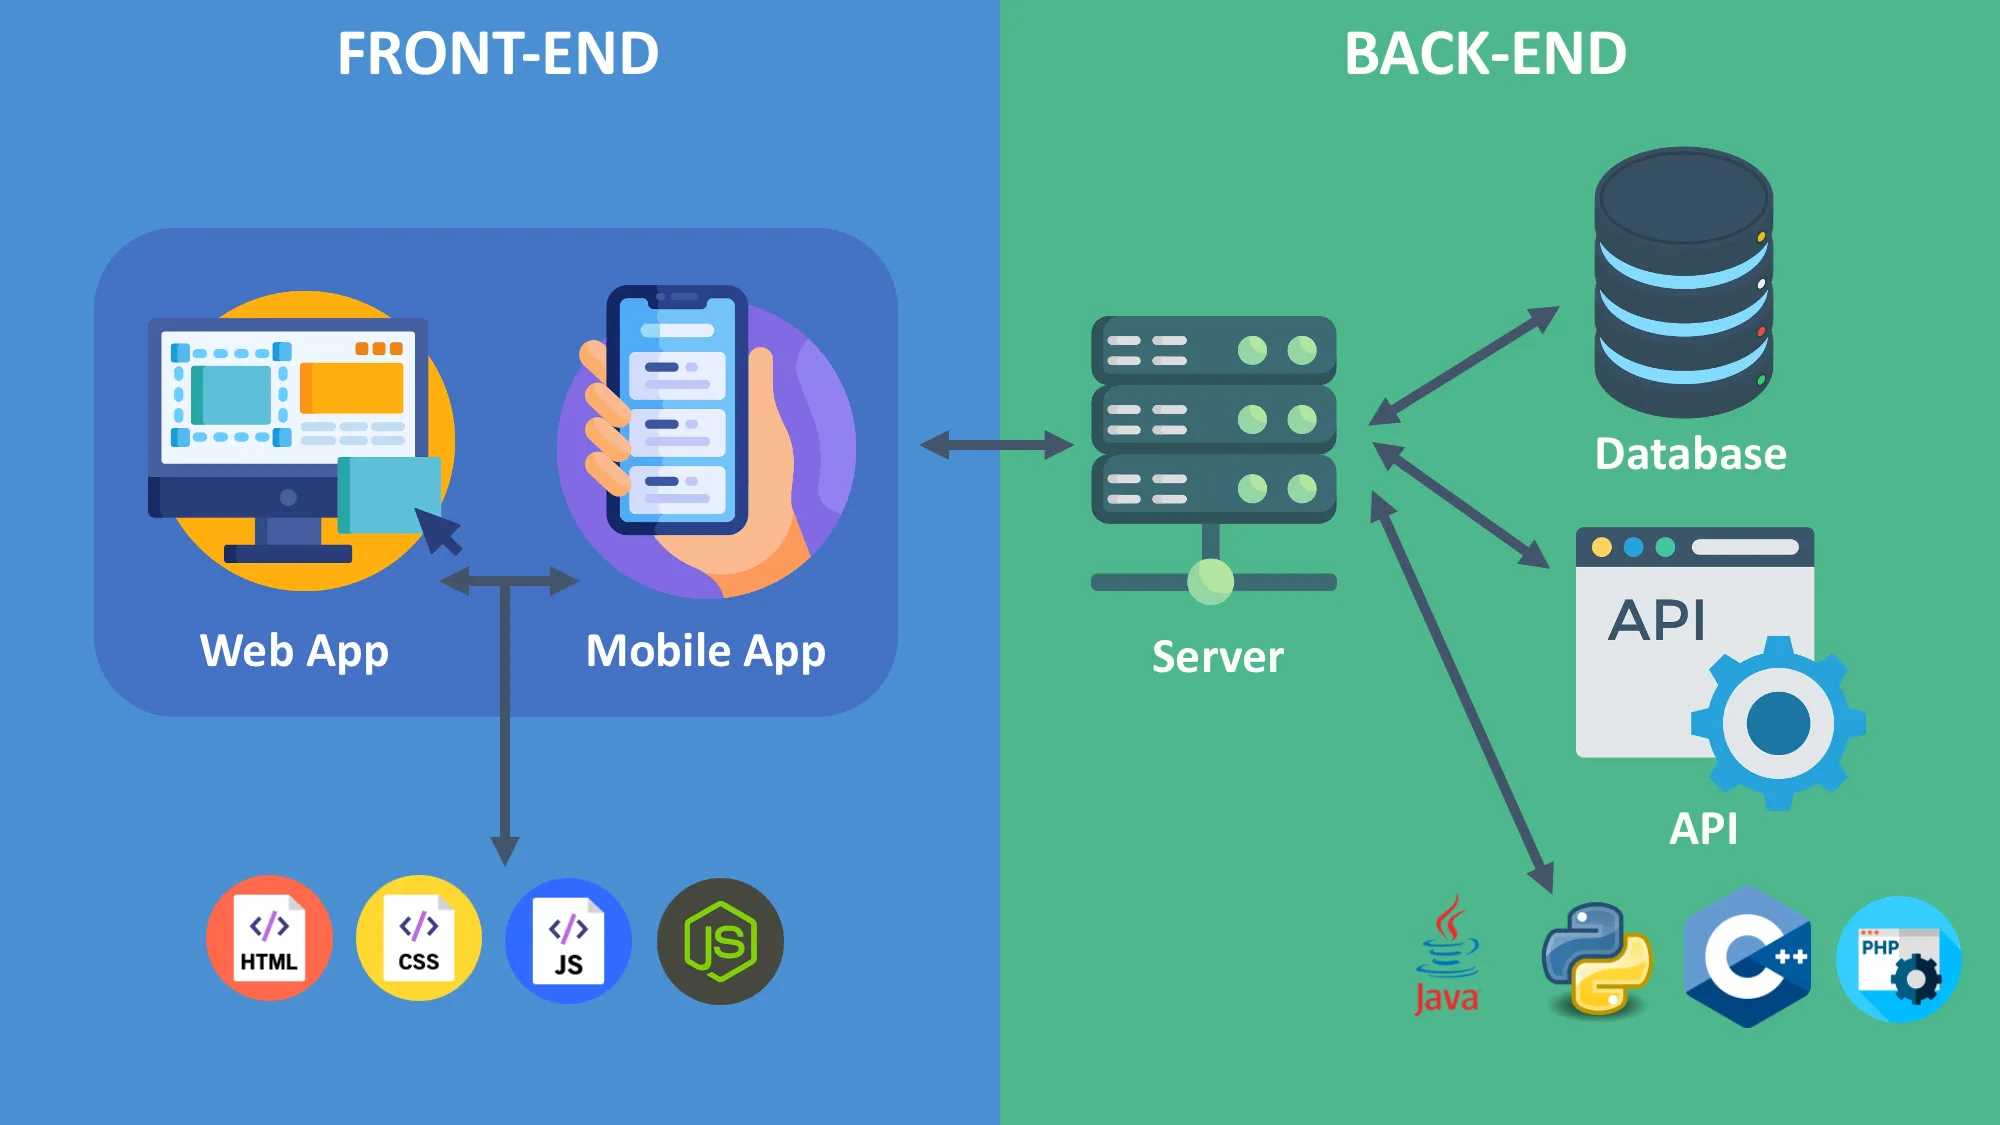
Image source: Streamlining Backend-Frontend Integration: A Quick Guide
Table:
Step 01 | Preparation - Document Management
1. Brief:
- Setting up server files for configuring a CRUD methods based REST API
- Setting up a MongoDB Atlas account, project and new cluster.
- Start configuring the routing mechanism for accessing the database.
- Creating API endpoints based on the CRUD methods.
- Run the connection code file with Node.js.
- Testing the API with Postman or Termnals.
2. Directory File Structure:
In the same directory of my HTML, CSS and JS files, I created the following objects for the backend.
Step 02 | Setting up a MongoDB Atlas account, project and new cluster.
Key Steps:
-
Creating a new project

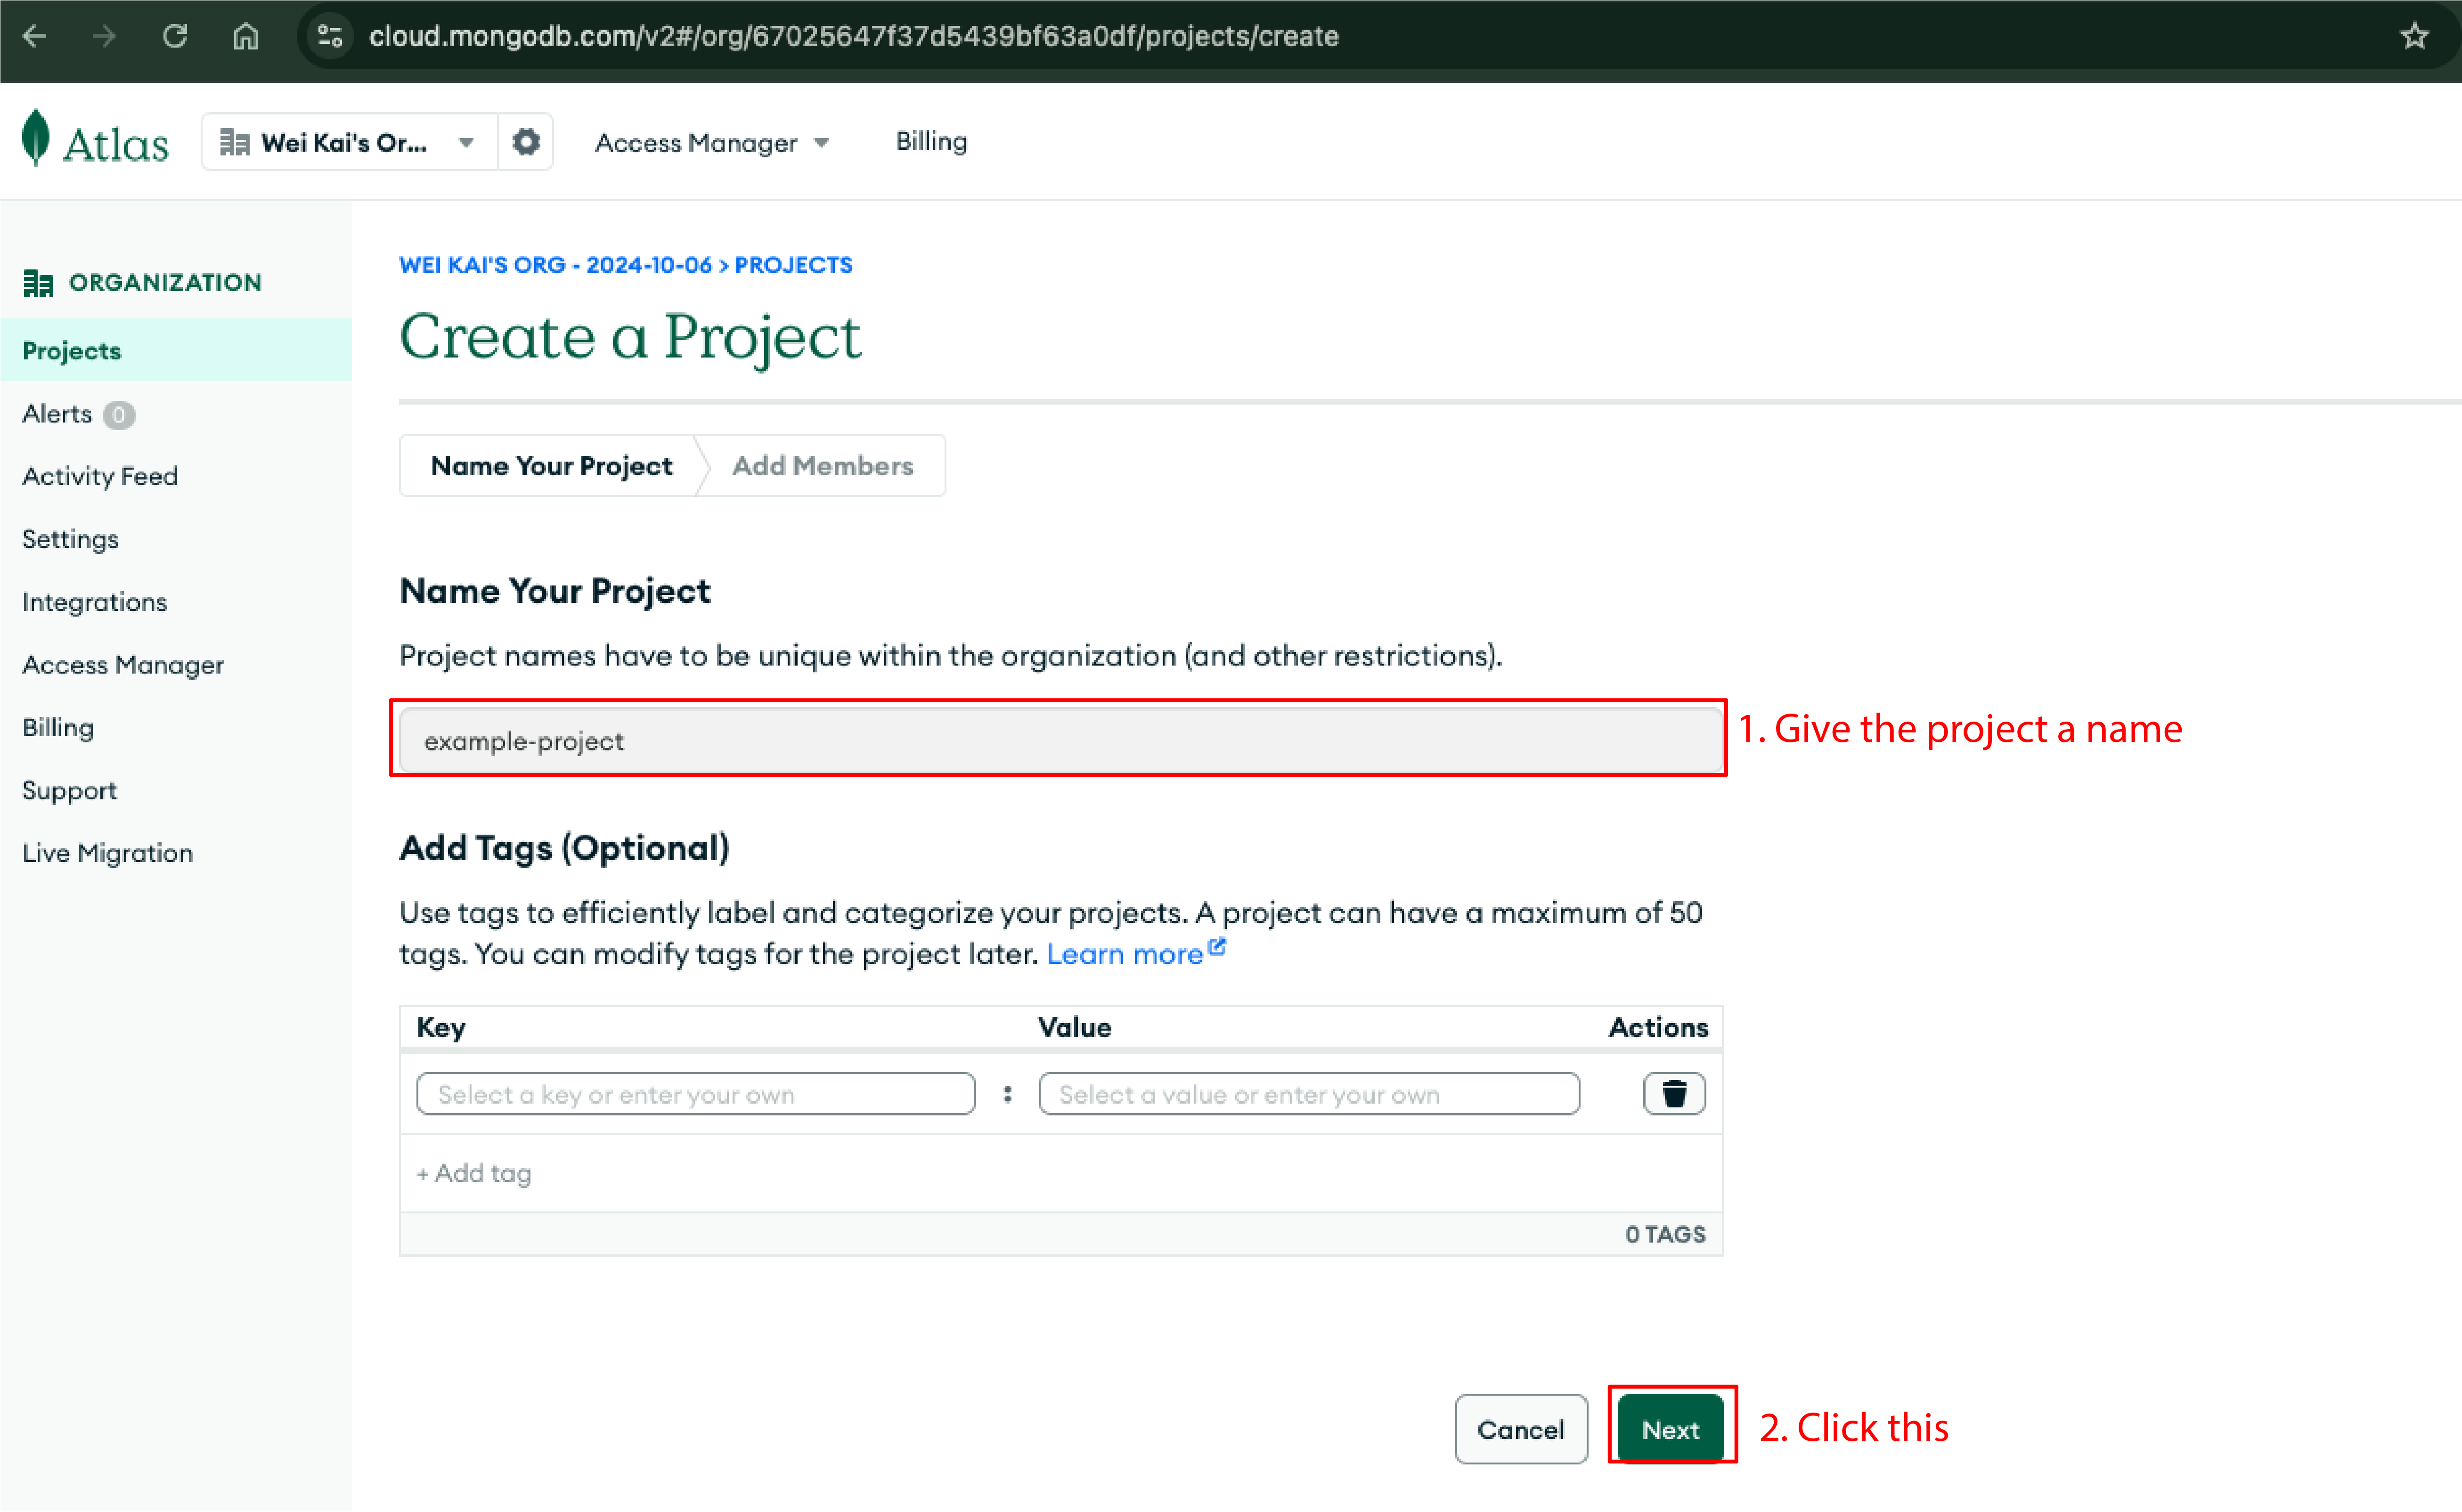
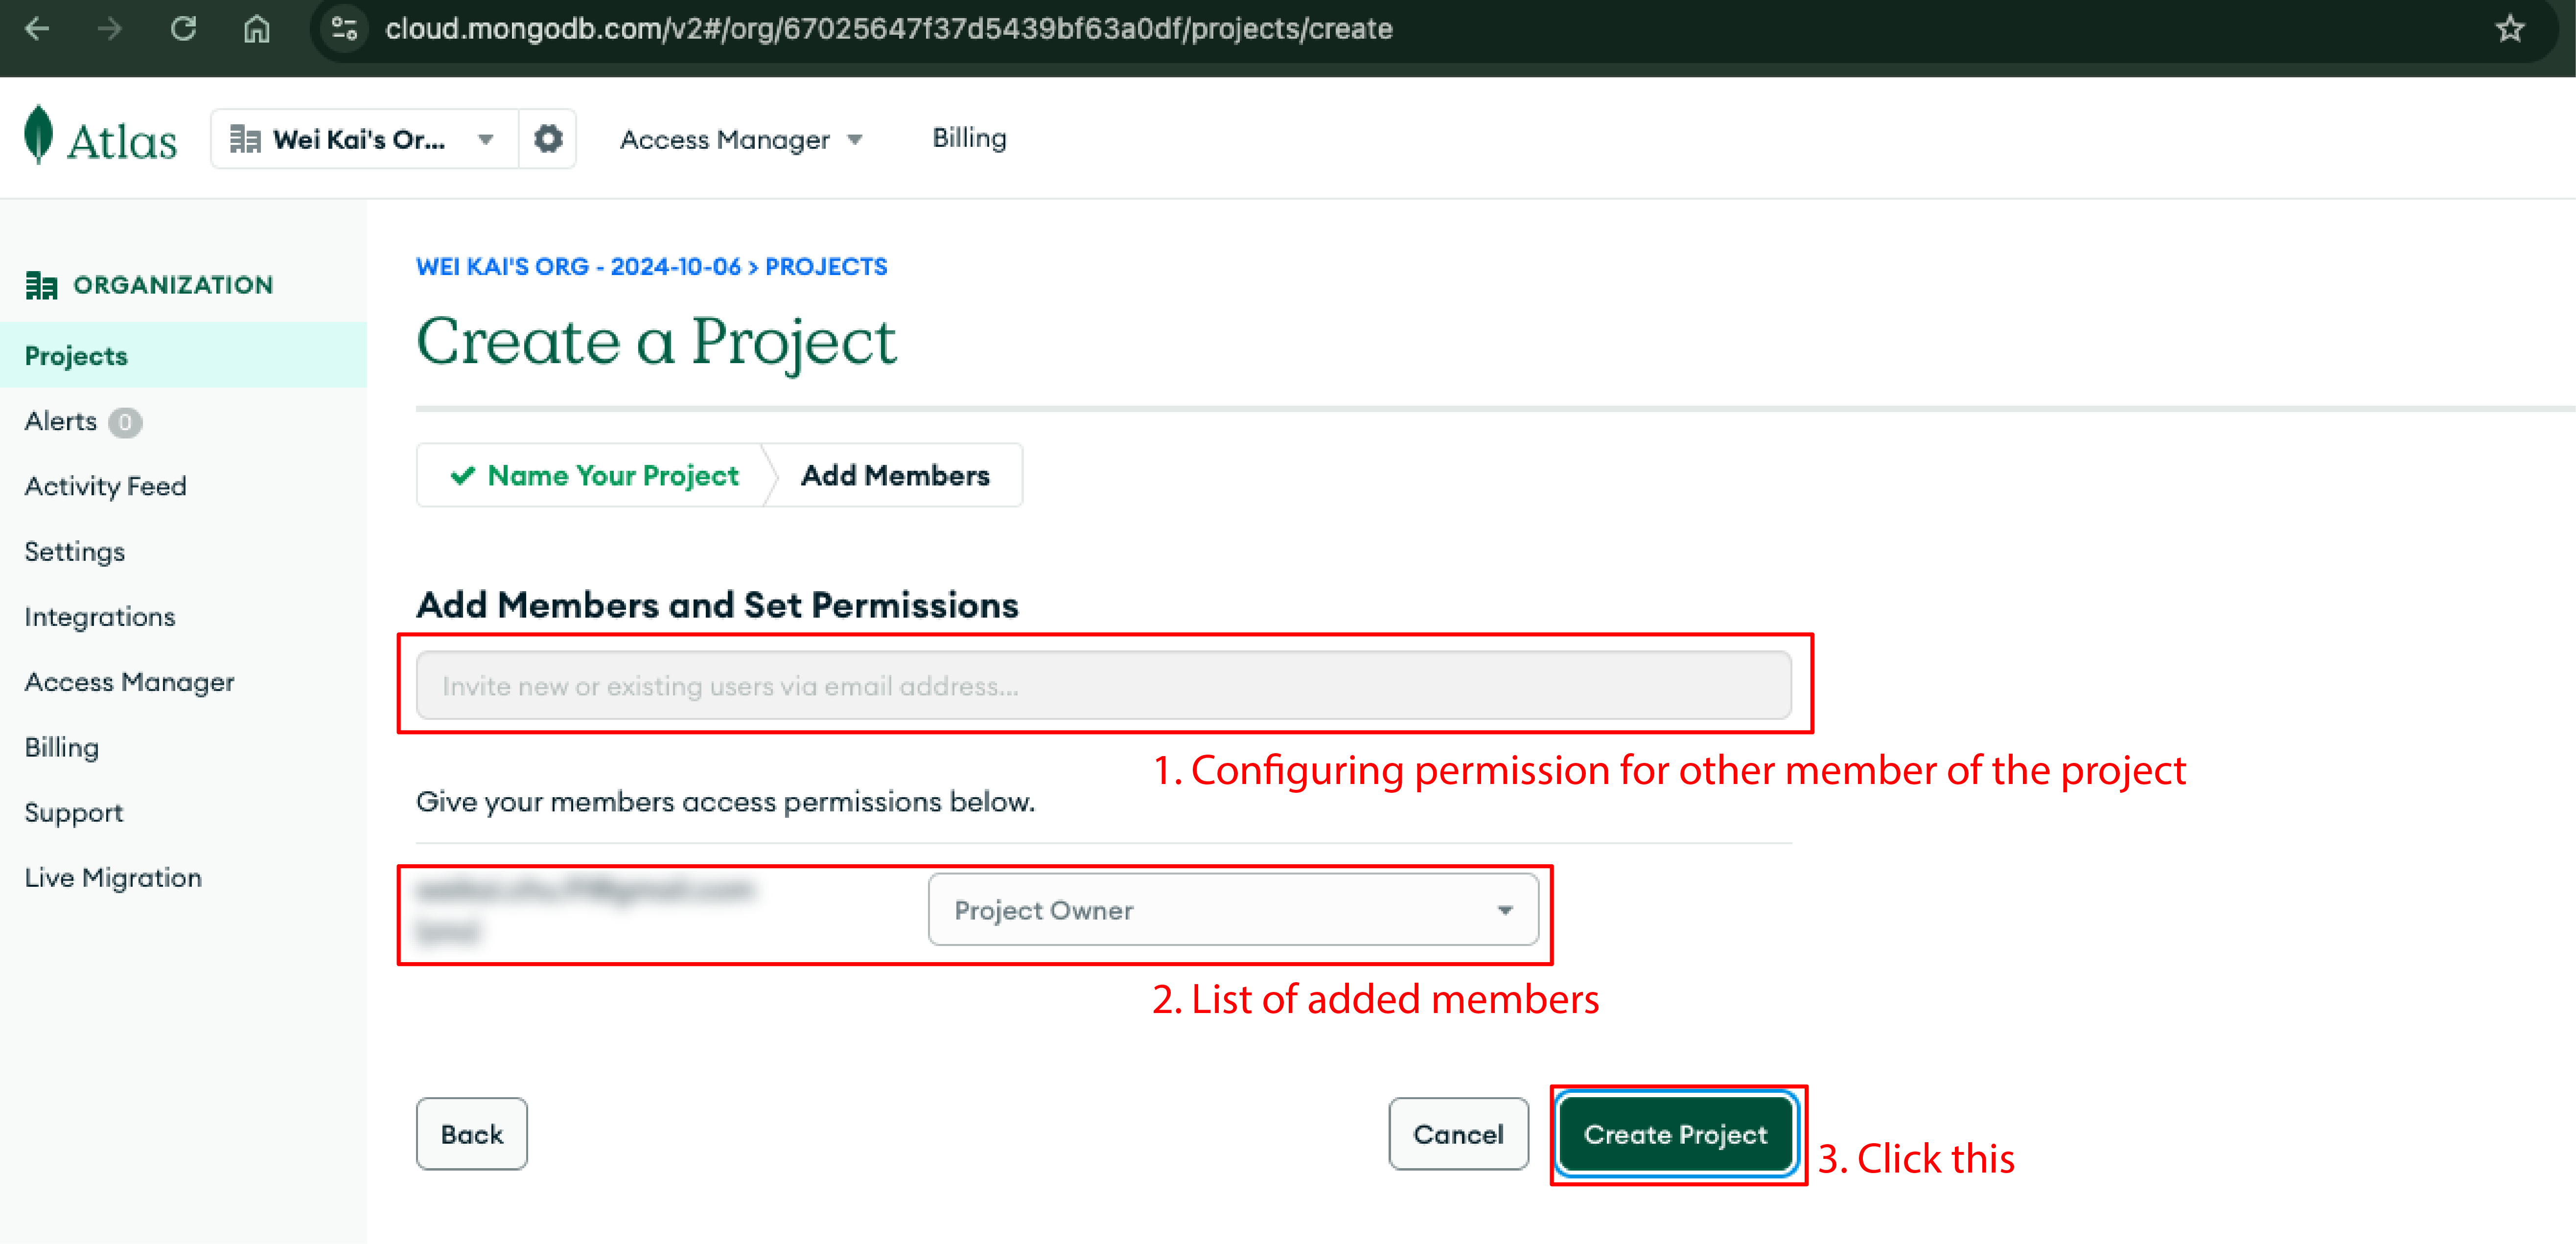
-
Creating a cluster
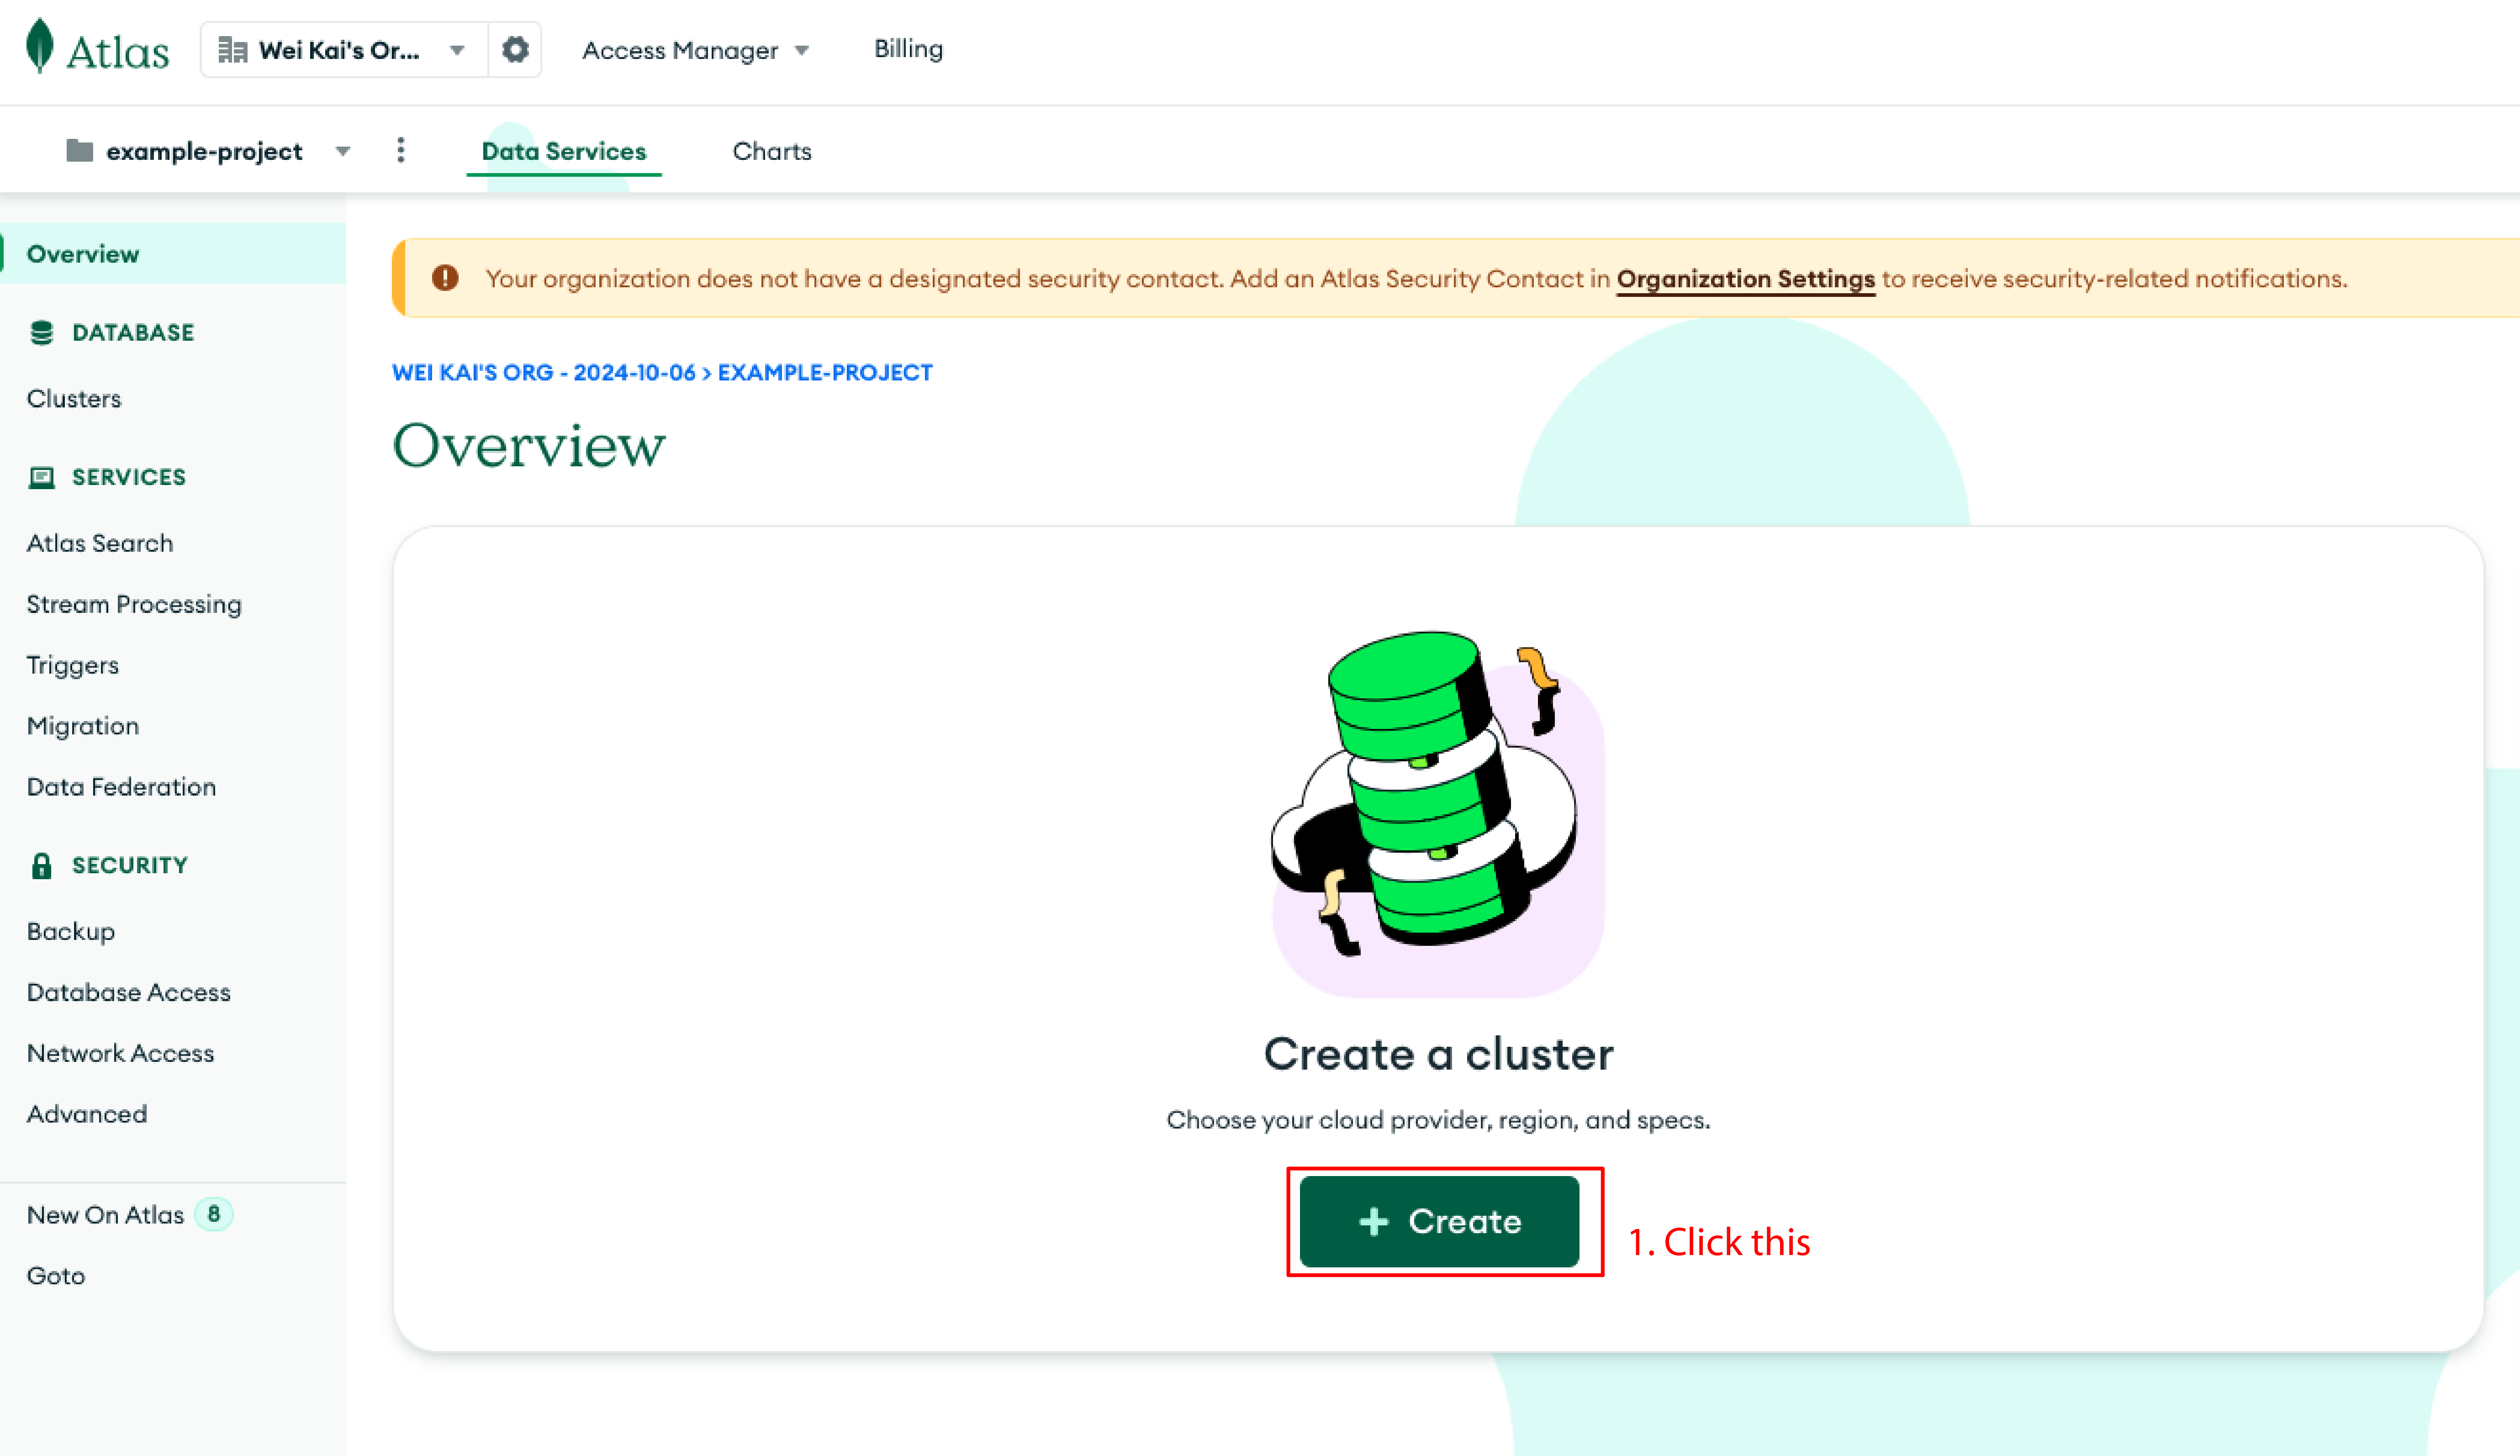
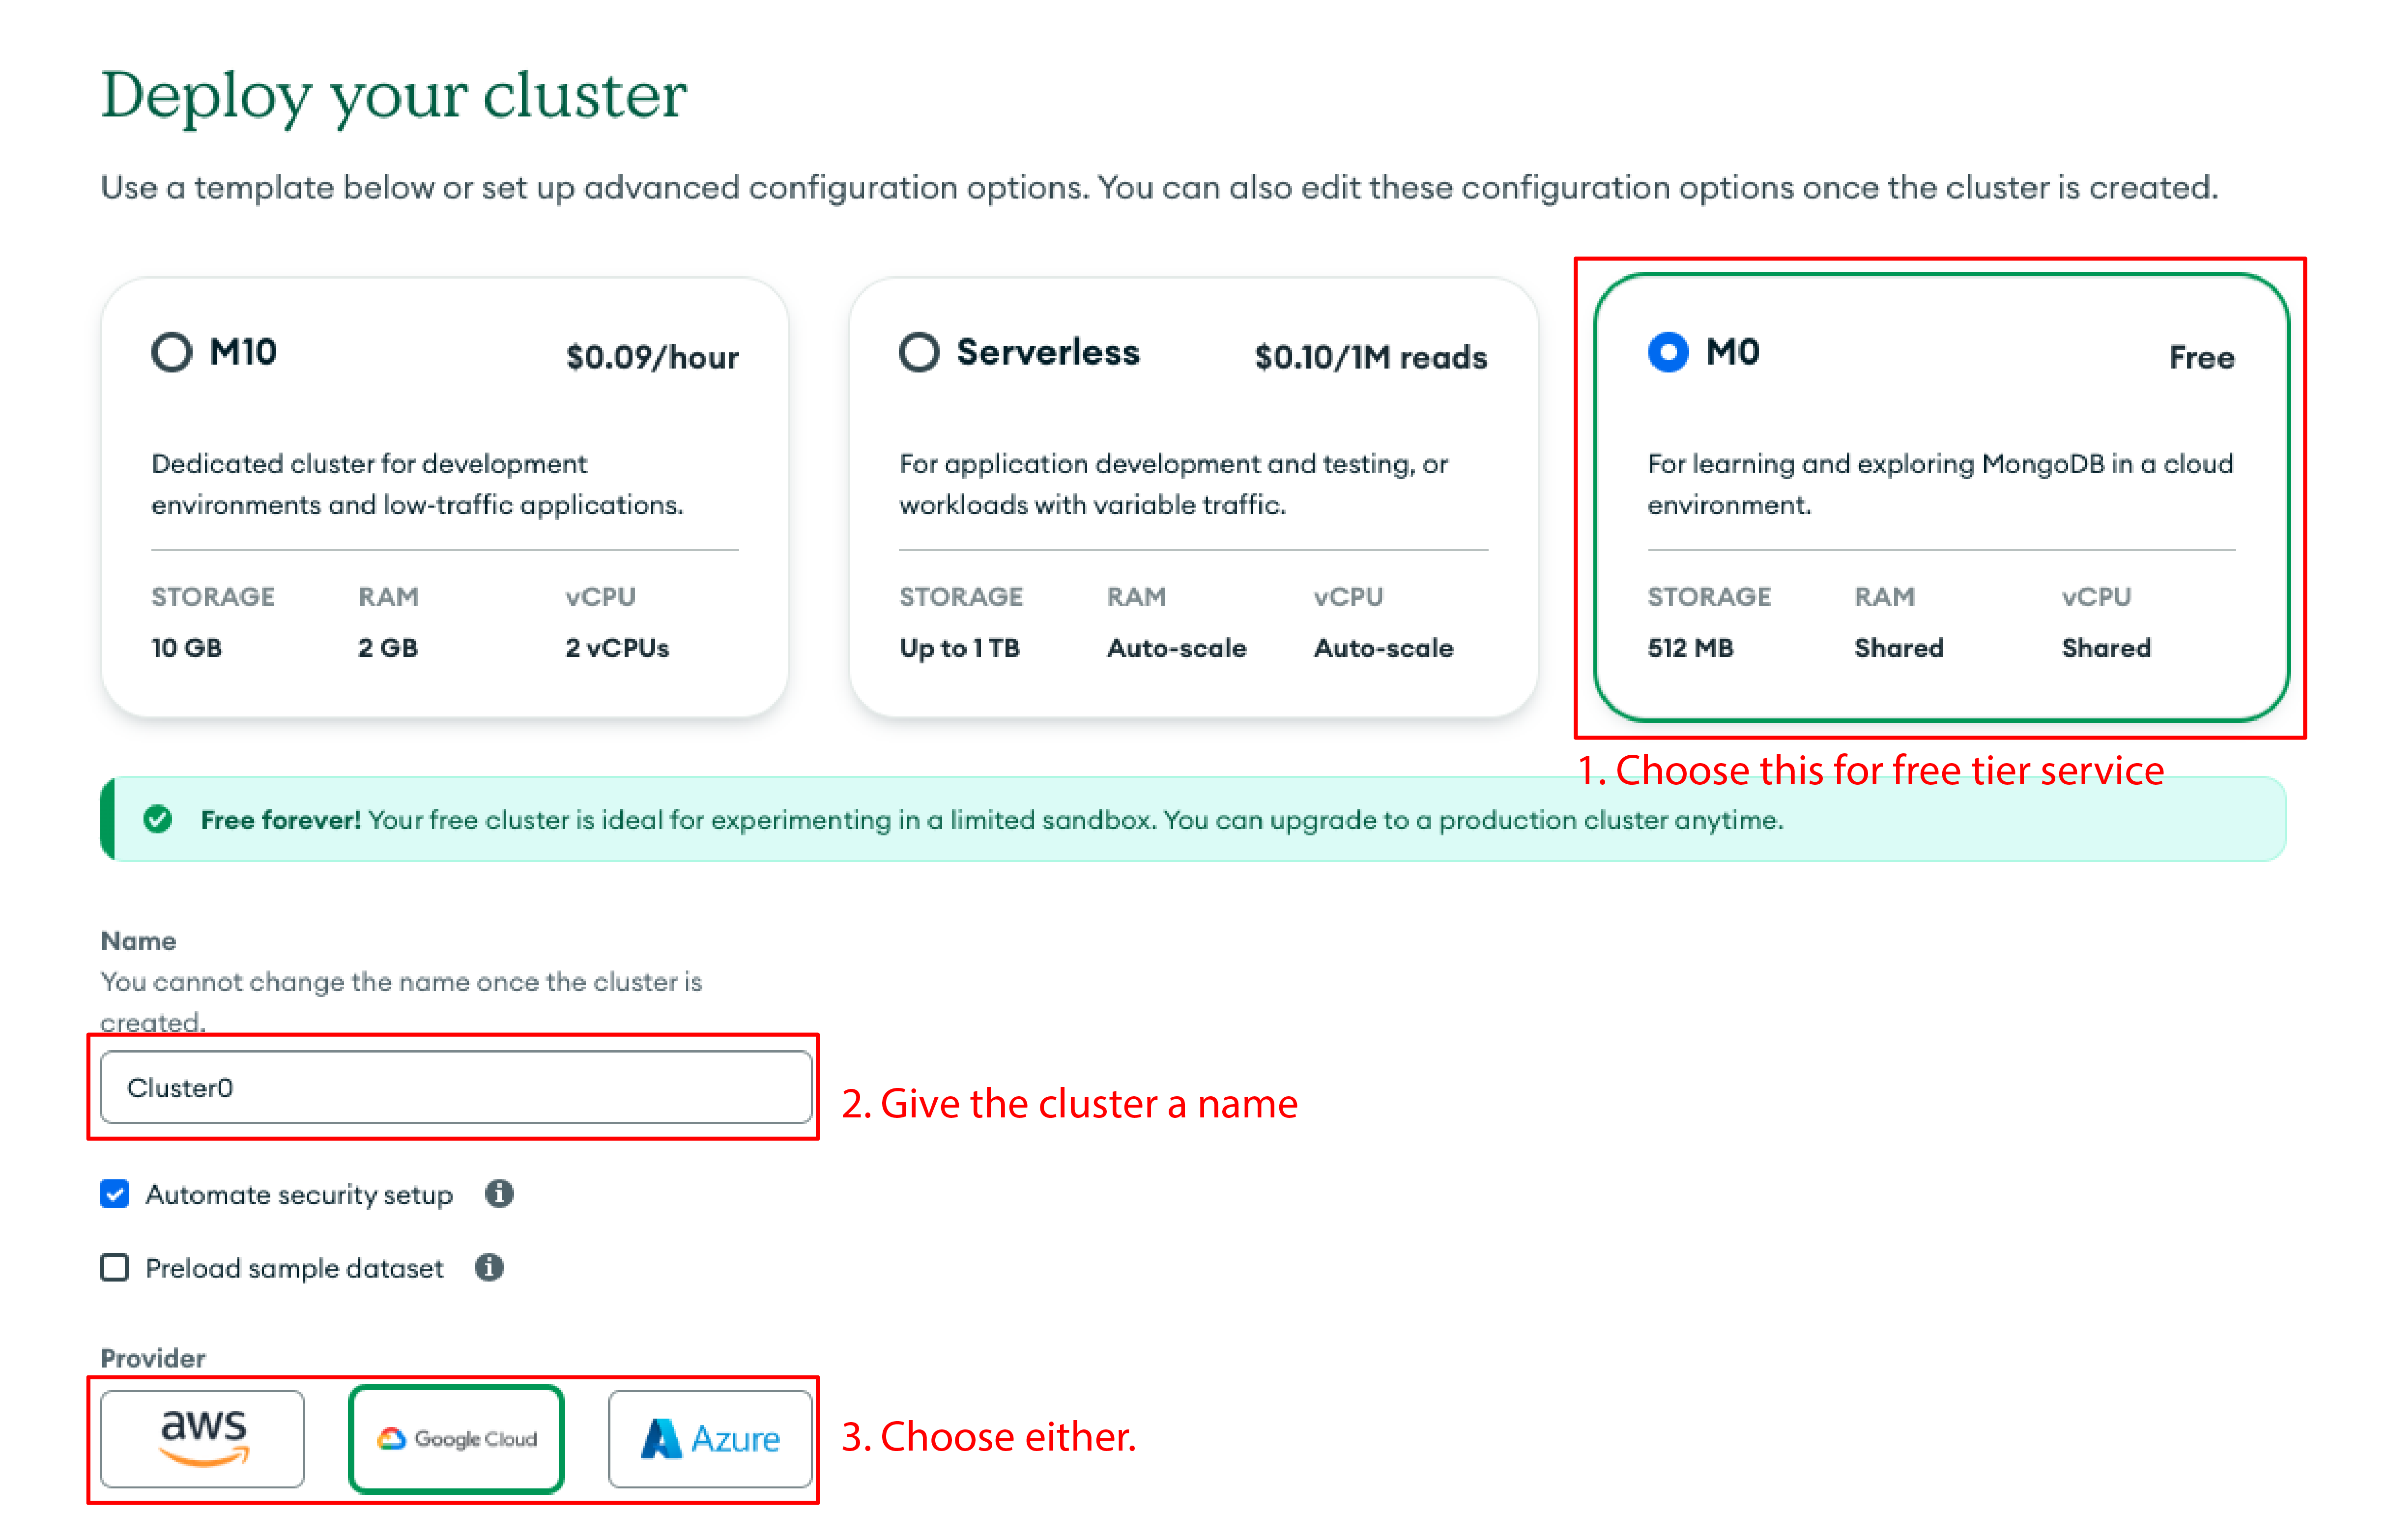

-
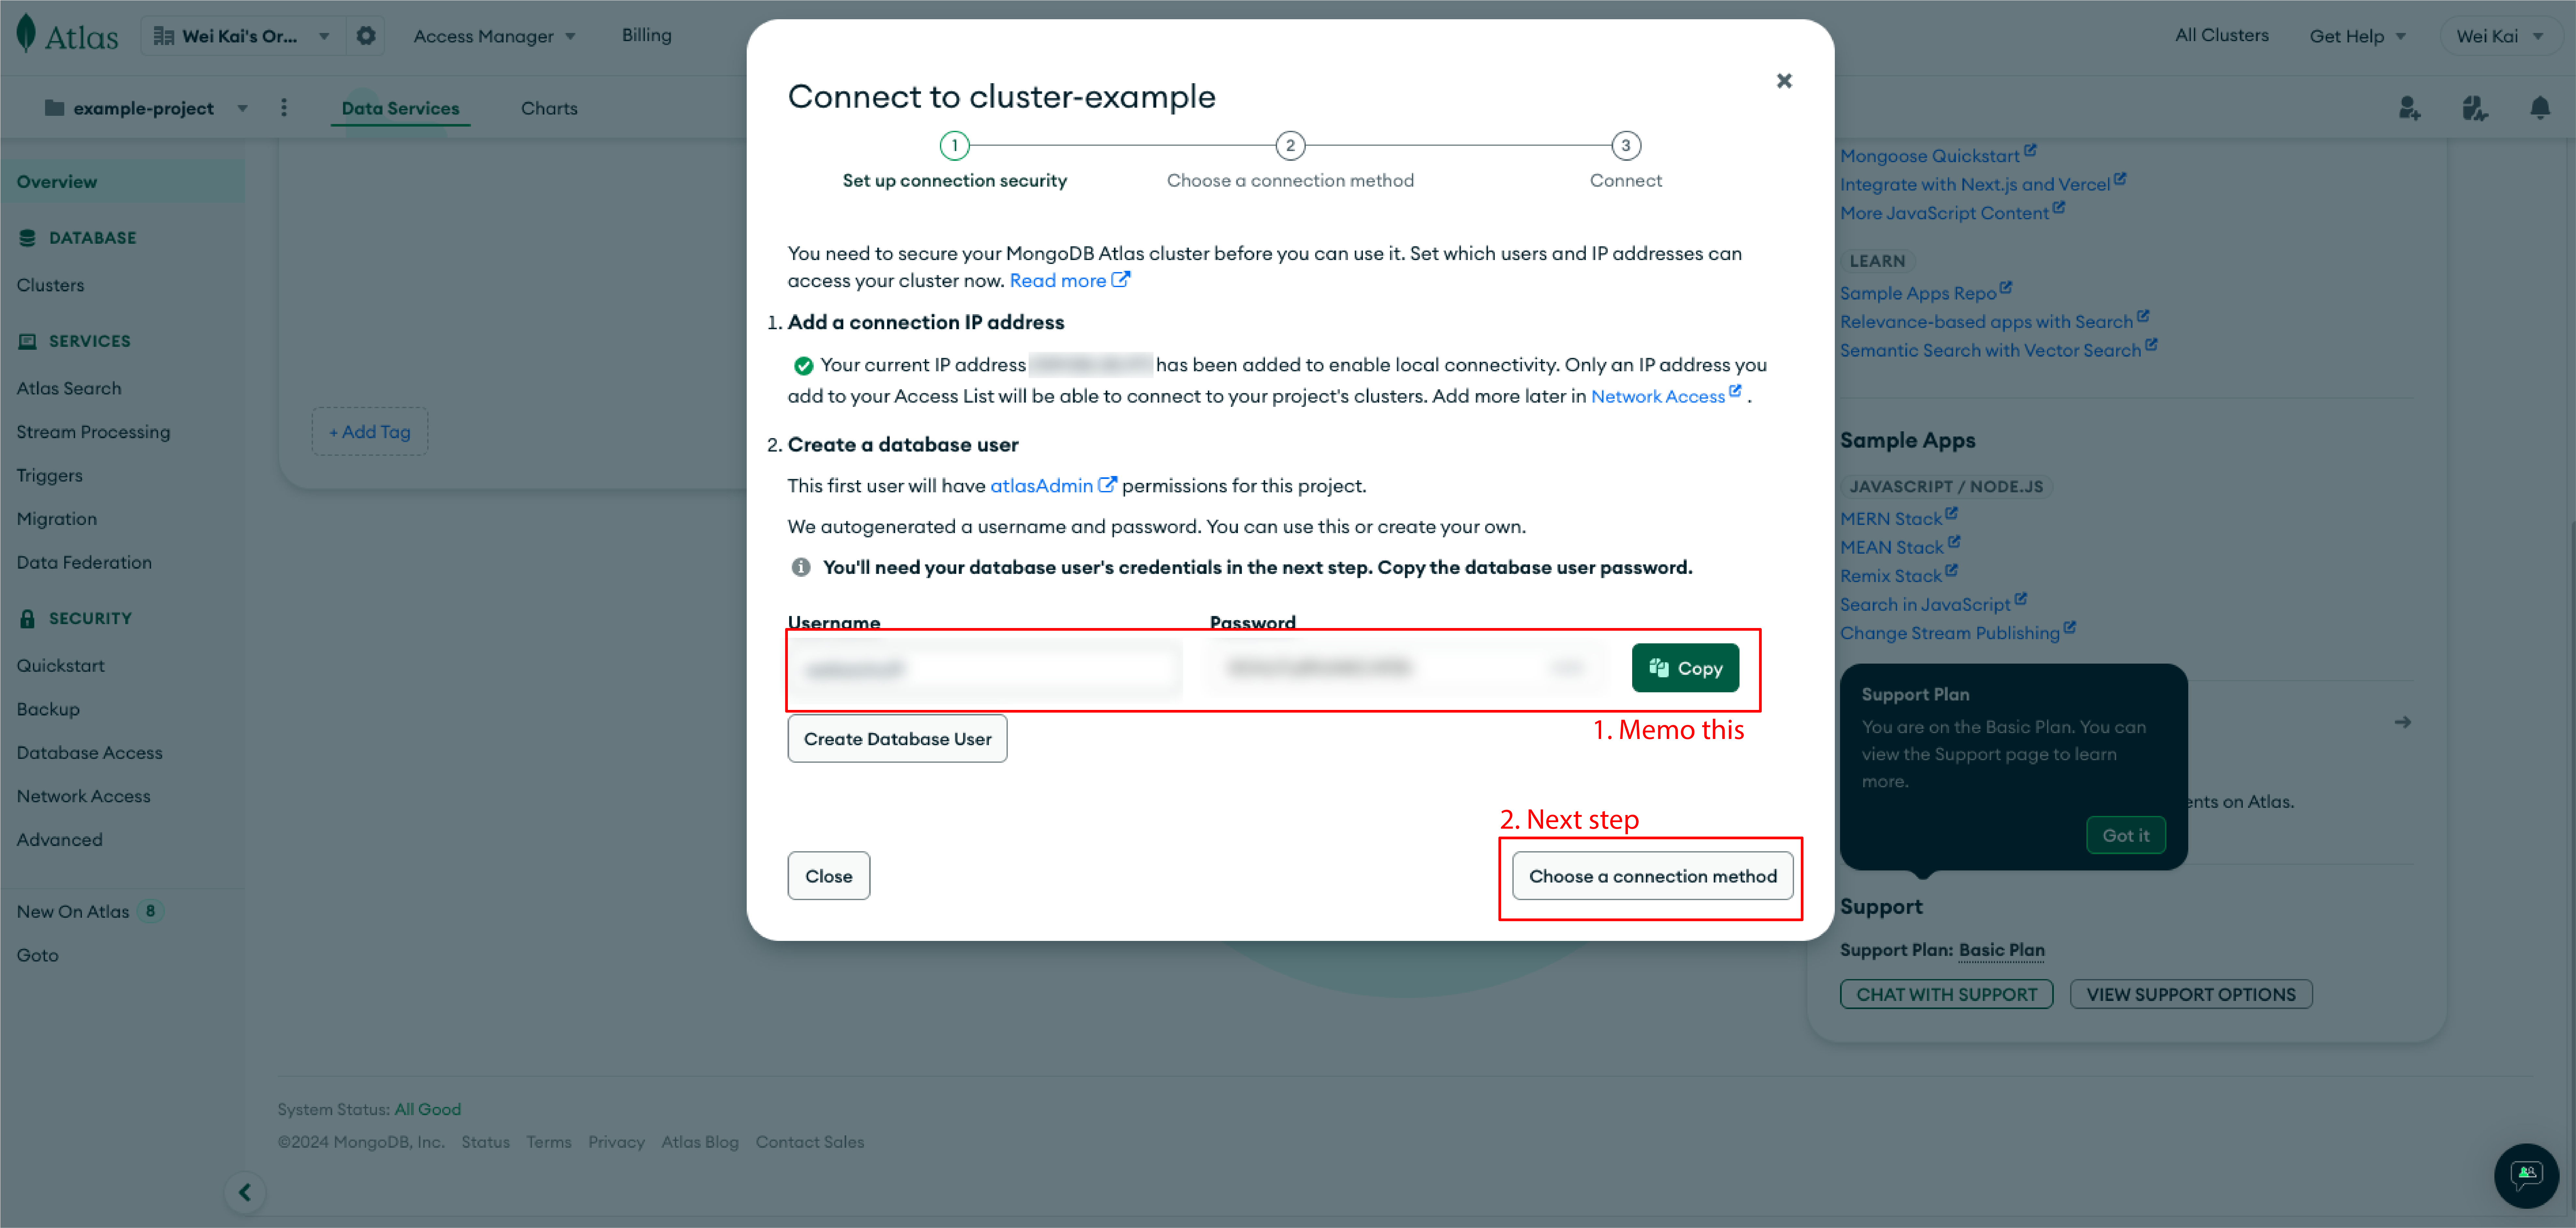
Connection Form
A connection form will pop-up after “Create Deployment” is clicked. Memo down the “Username” & “Password”, this will be needed as the environment variables for connecting to the database. Click the “Create Database User” before proceeding to “Choose a connection method”
-
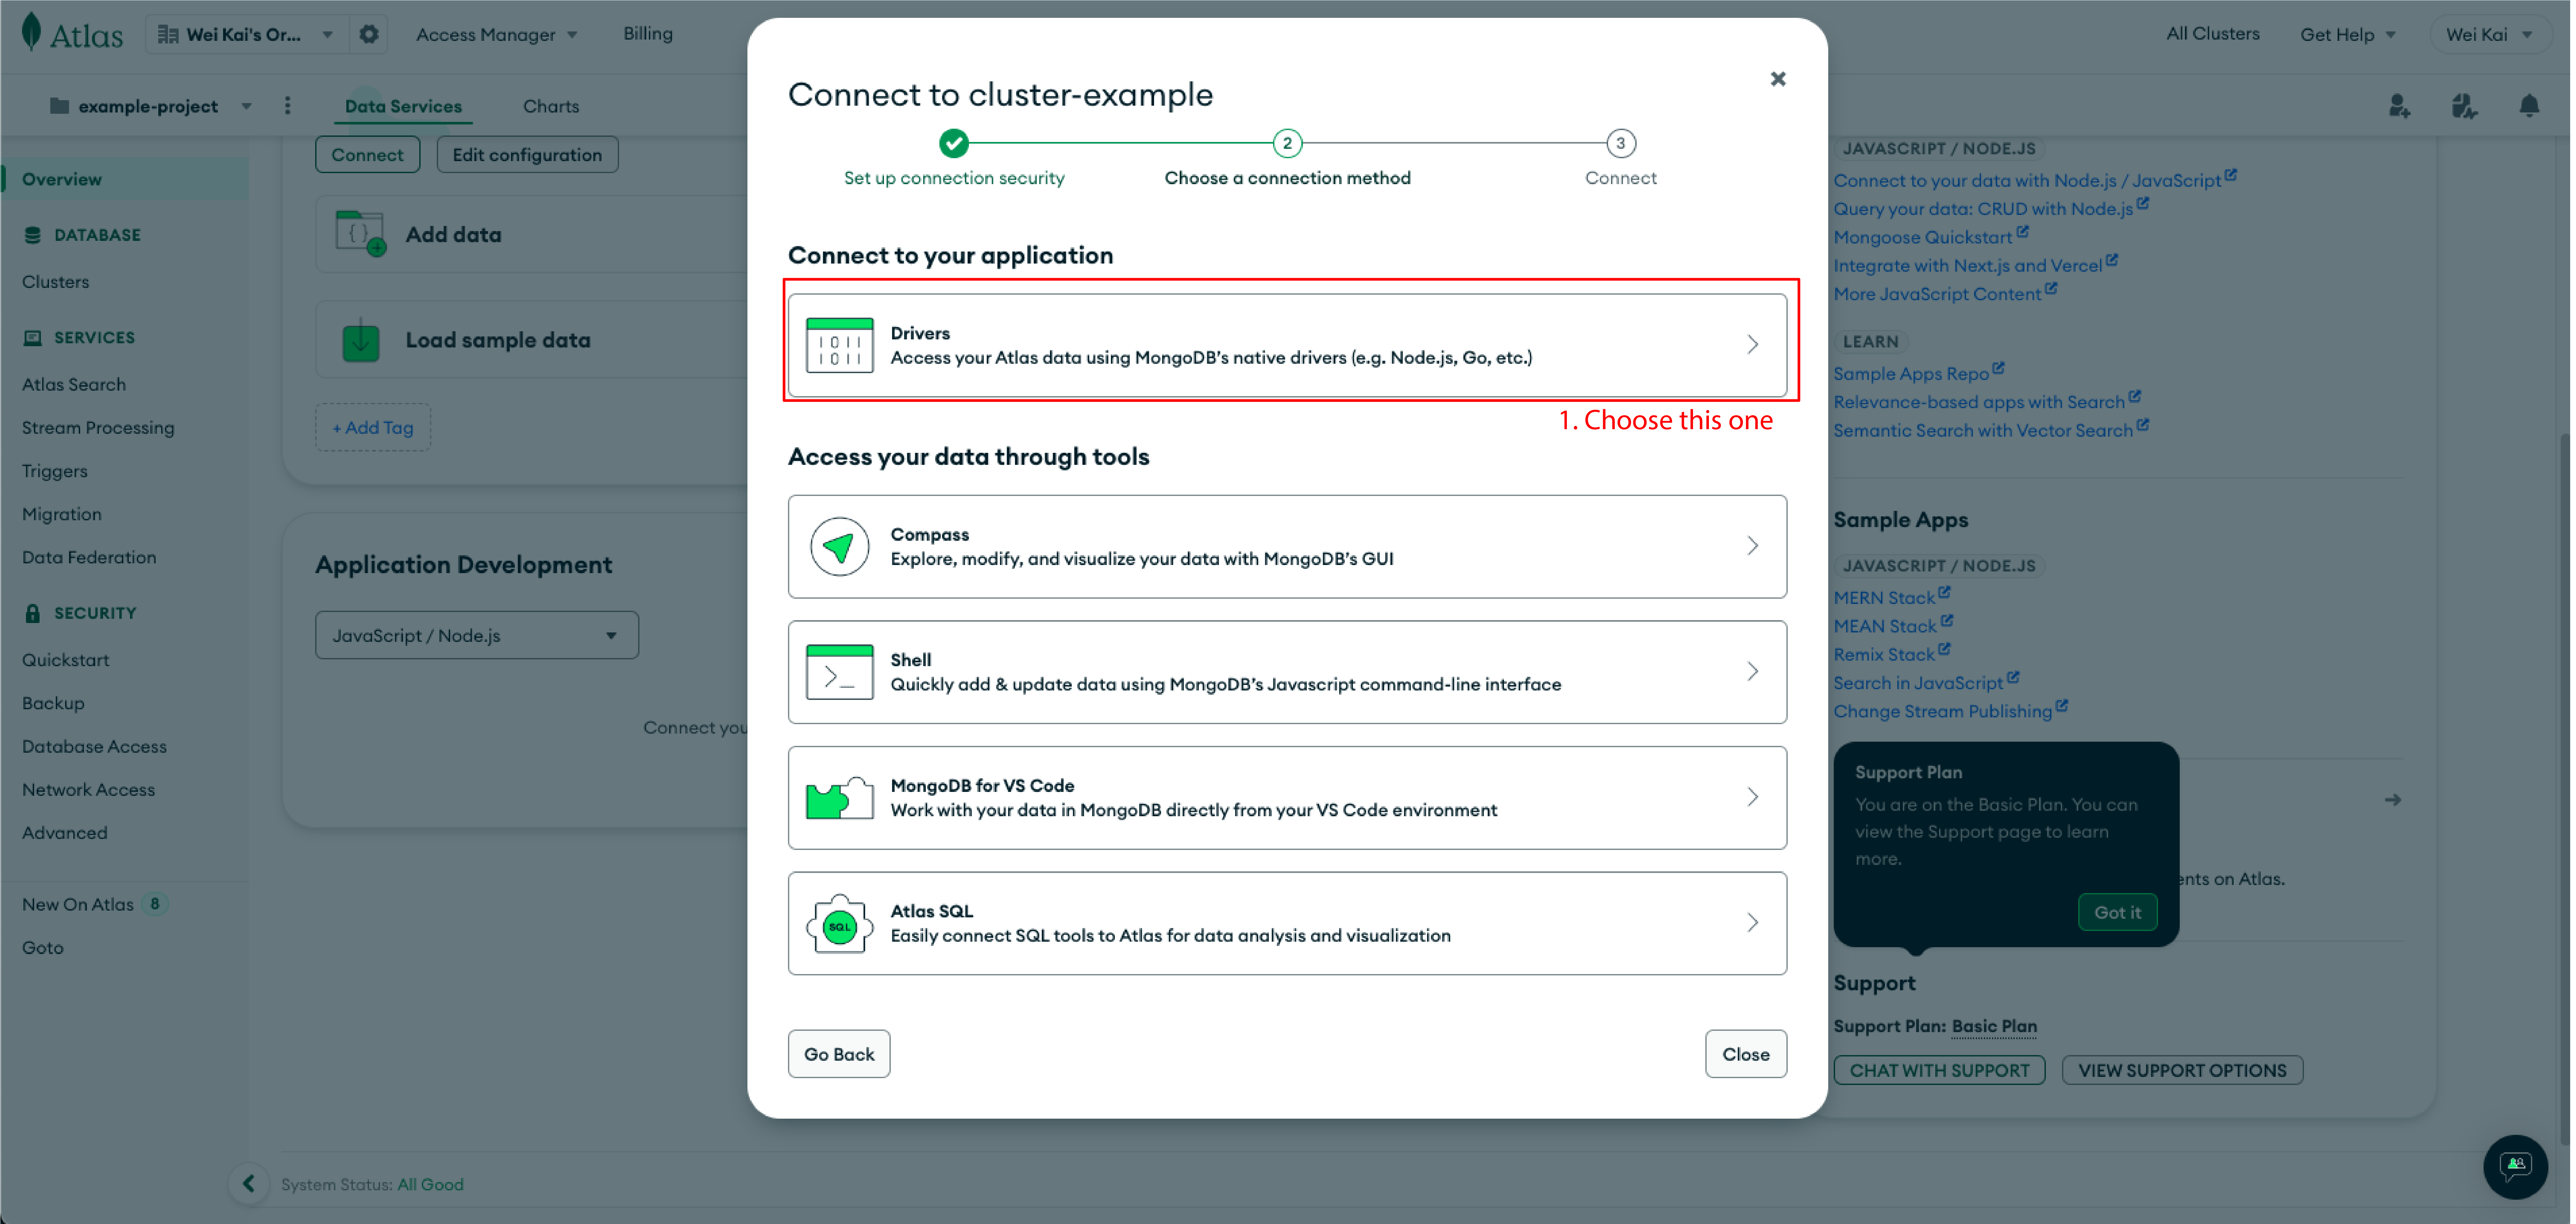
Connection Method
Choosing the Connection Method. Choosing “Drivers” option as the connection method, which will allow us to access the database with native drivers, like Node.js, Go, etc.
-
Connection String
In the next connection step, set the choice of the driver / version as
Node.js / v 5.5or later. Following the instruction of installing the driver. Memo down the connection string which will be needed to include in the server routing file.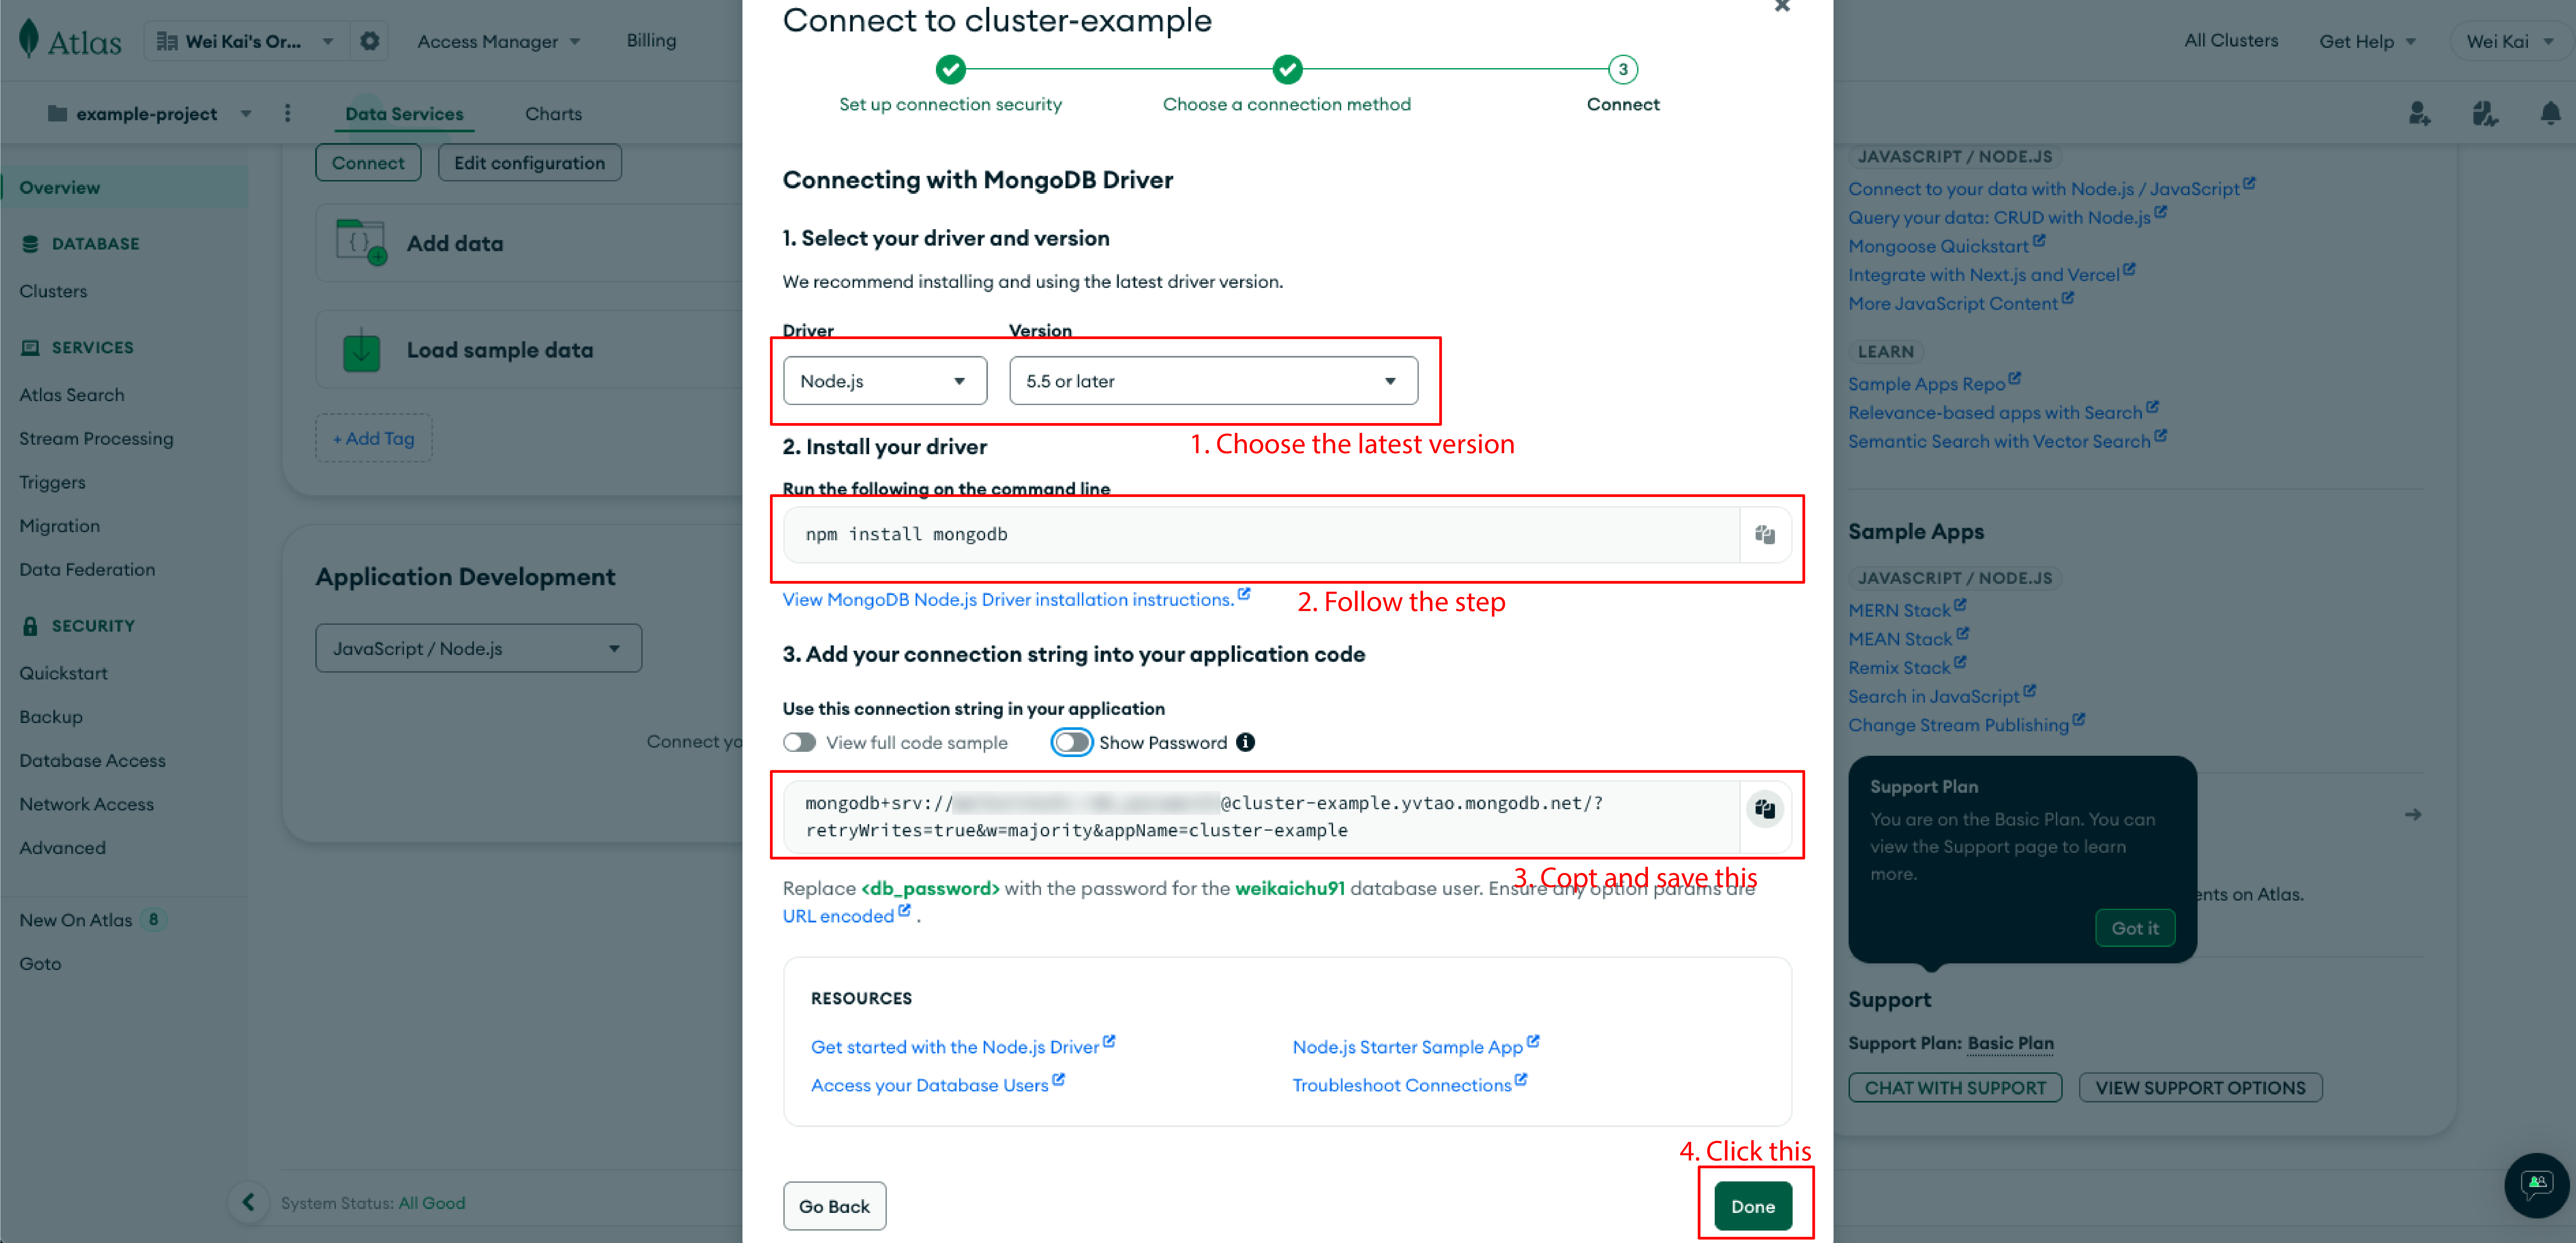
-
Cluster & Collection
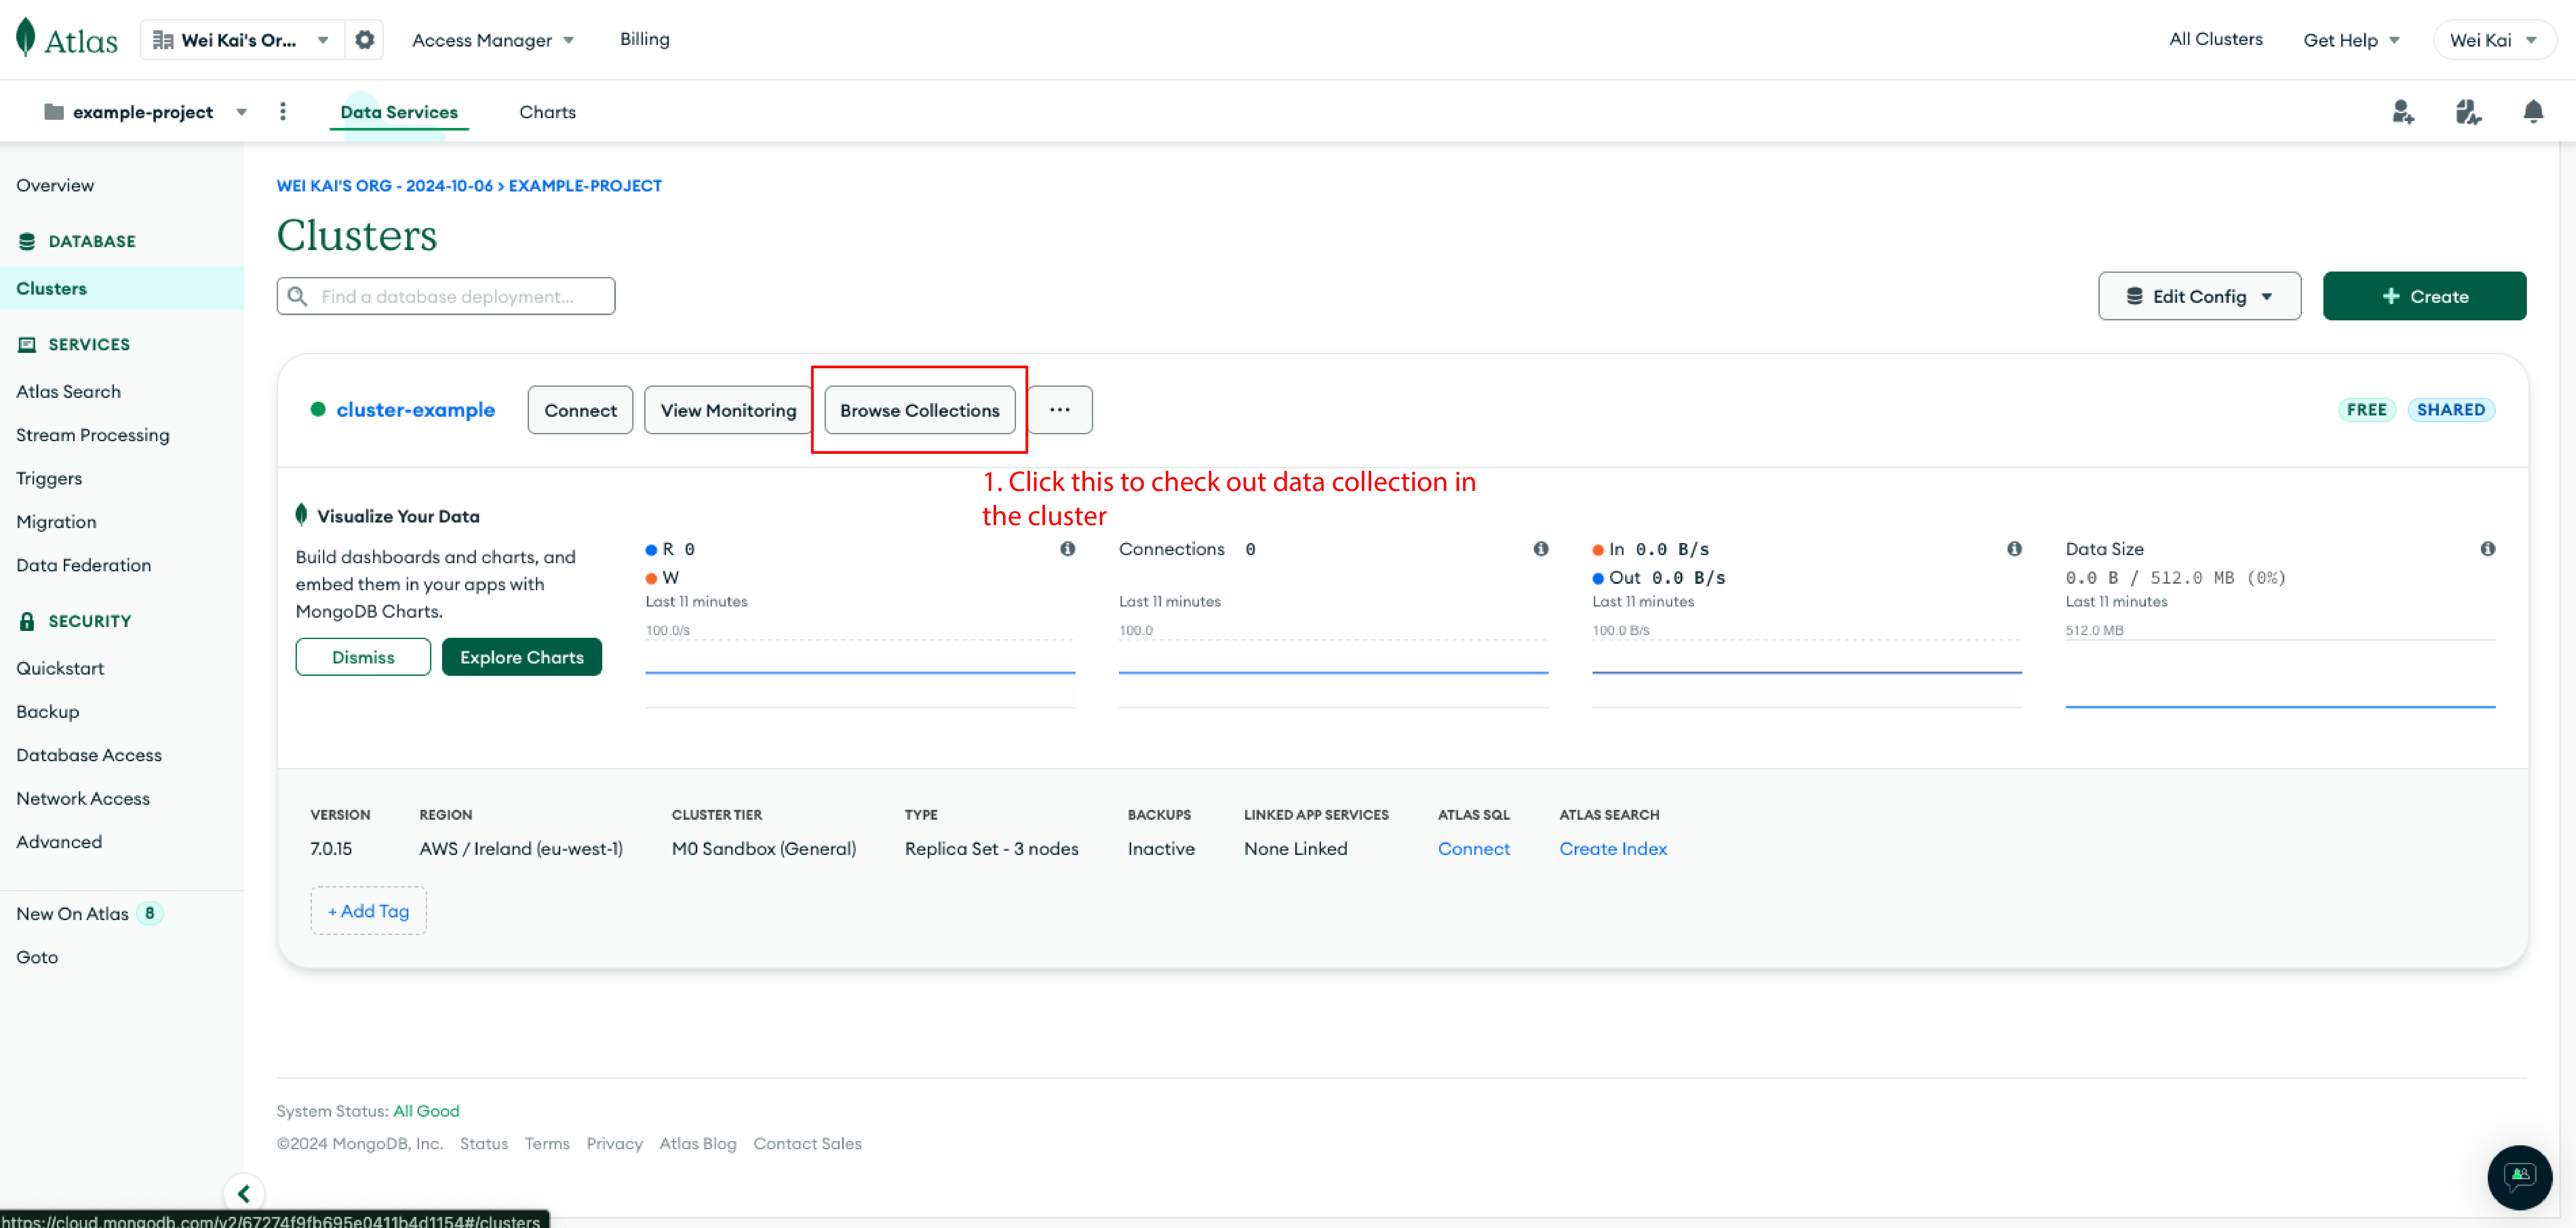
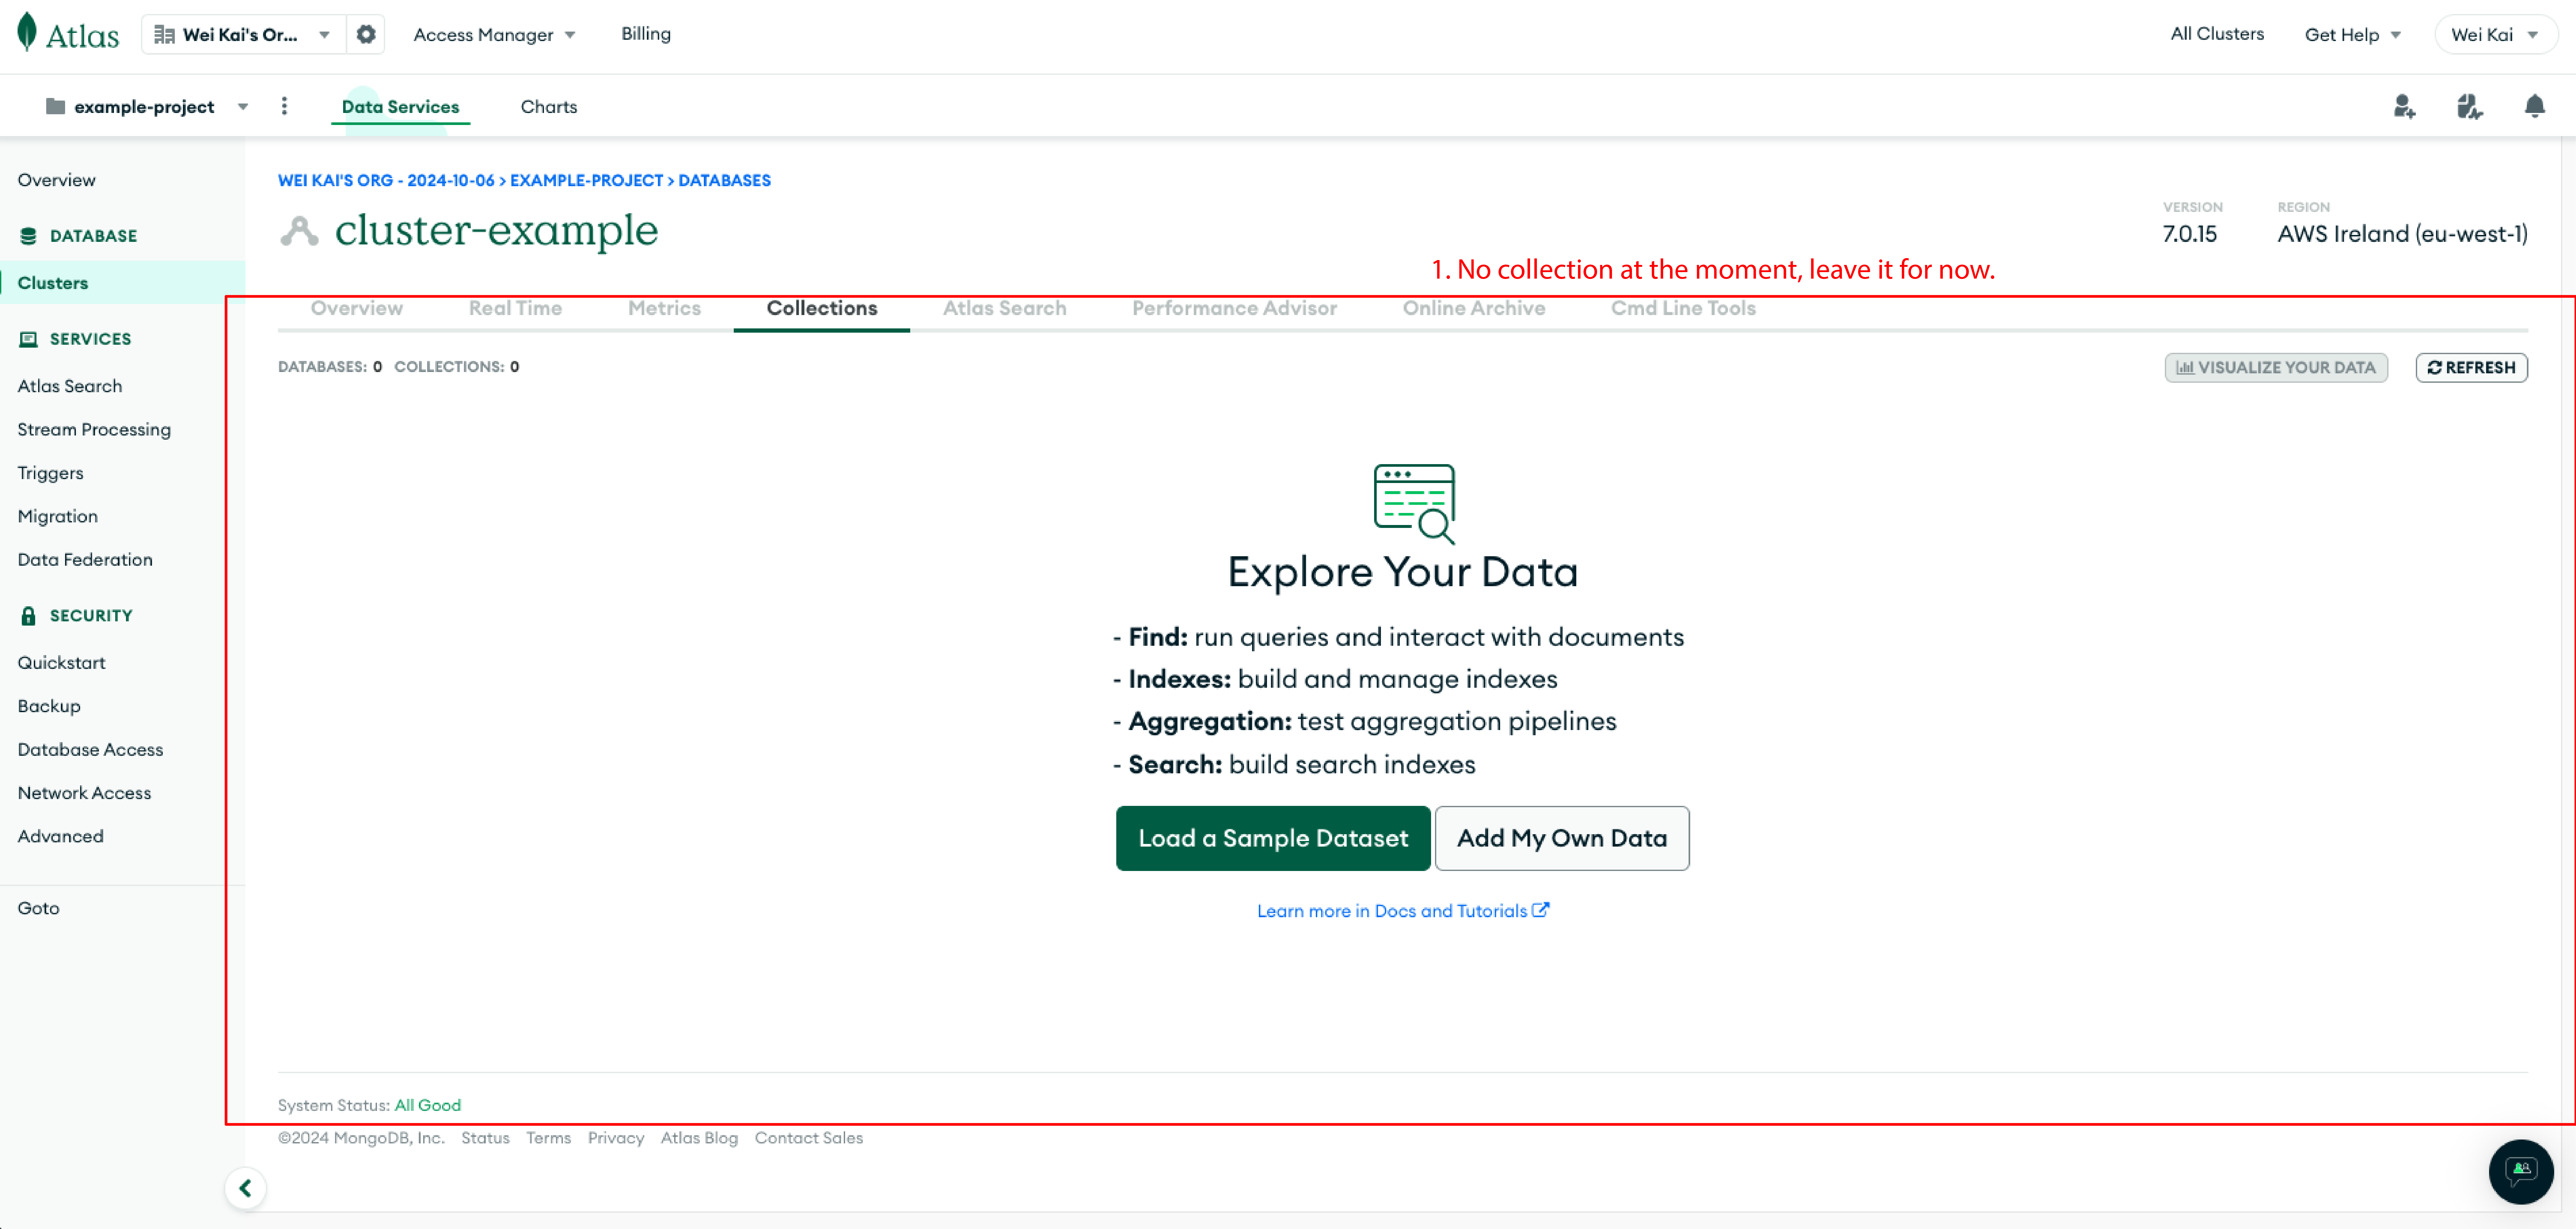
Go to the “Clusters” pane in the menu on the left side of the screen, the newly created cluster will be found. In each cluster, the data will be stored as a collection, which will be found by clicking “Browse Collections” (At the moment no data can be found in there).
Step 03 | Start configuring the routing mechanism for accessing the database
Key Steps:
-
Setup environment variable
creating .env (specified in .gitignore) file for storing the user credential to the DB.
.env
-
Set Up Mongoose and Connect to MongoDB Atlas
Create a file named
server.jsto set up the Express server.server.js
Create a file named
db.jsto set up Mongoose and connect to MongoDB Atlas. The configuration will use the credentials from environment variables, and then starting the Express server on a specified port as well as handling any connection errors.db.js
Step 04 | Creating API endpoints based on the CRUD methods.
-
Define the Comment Model
Create a file named
Comment.jsto define the Comment schema and model.Comment.js
-
Defining API Endpoints Routing
Create a file named
comments.route.jsto set up the Express server and define the API endpoints.comments.route.js
Step 05 | Run the connection code file with Node.js.
-
Running the node module for testing the api connection, using the command:
terminal

-
5-1. Testing the API with Postman
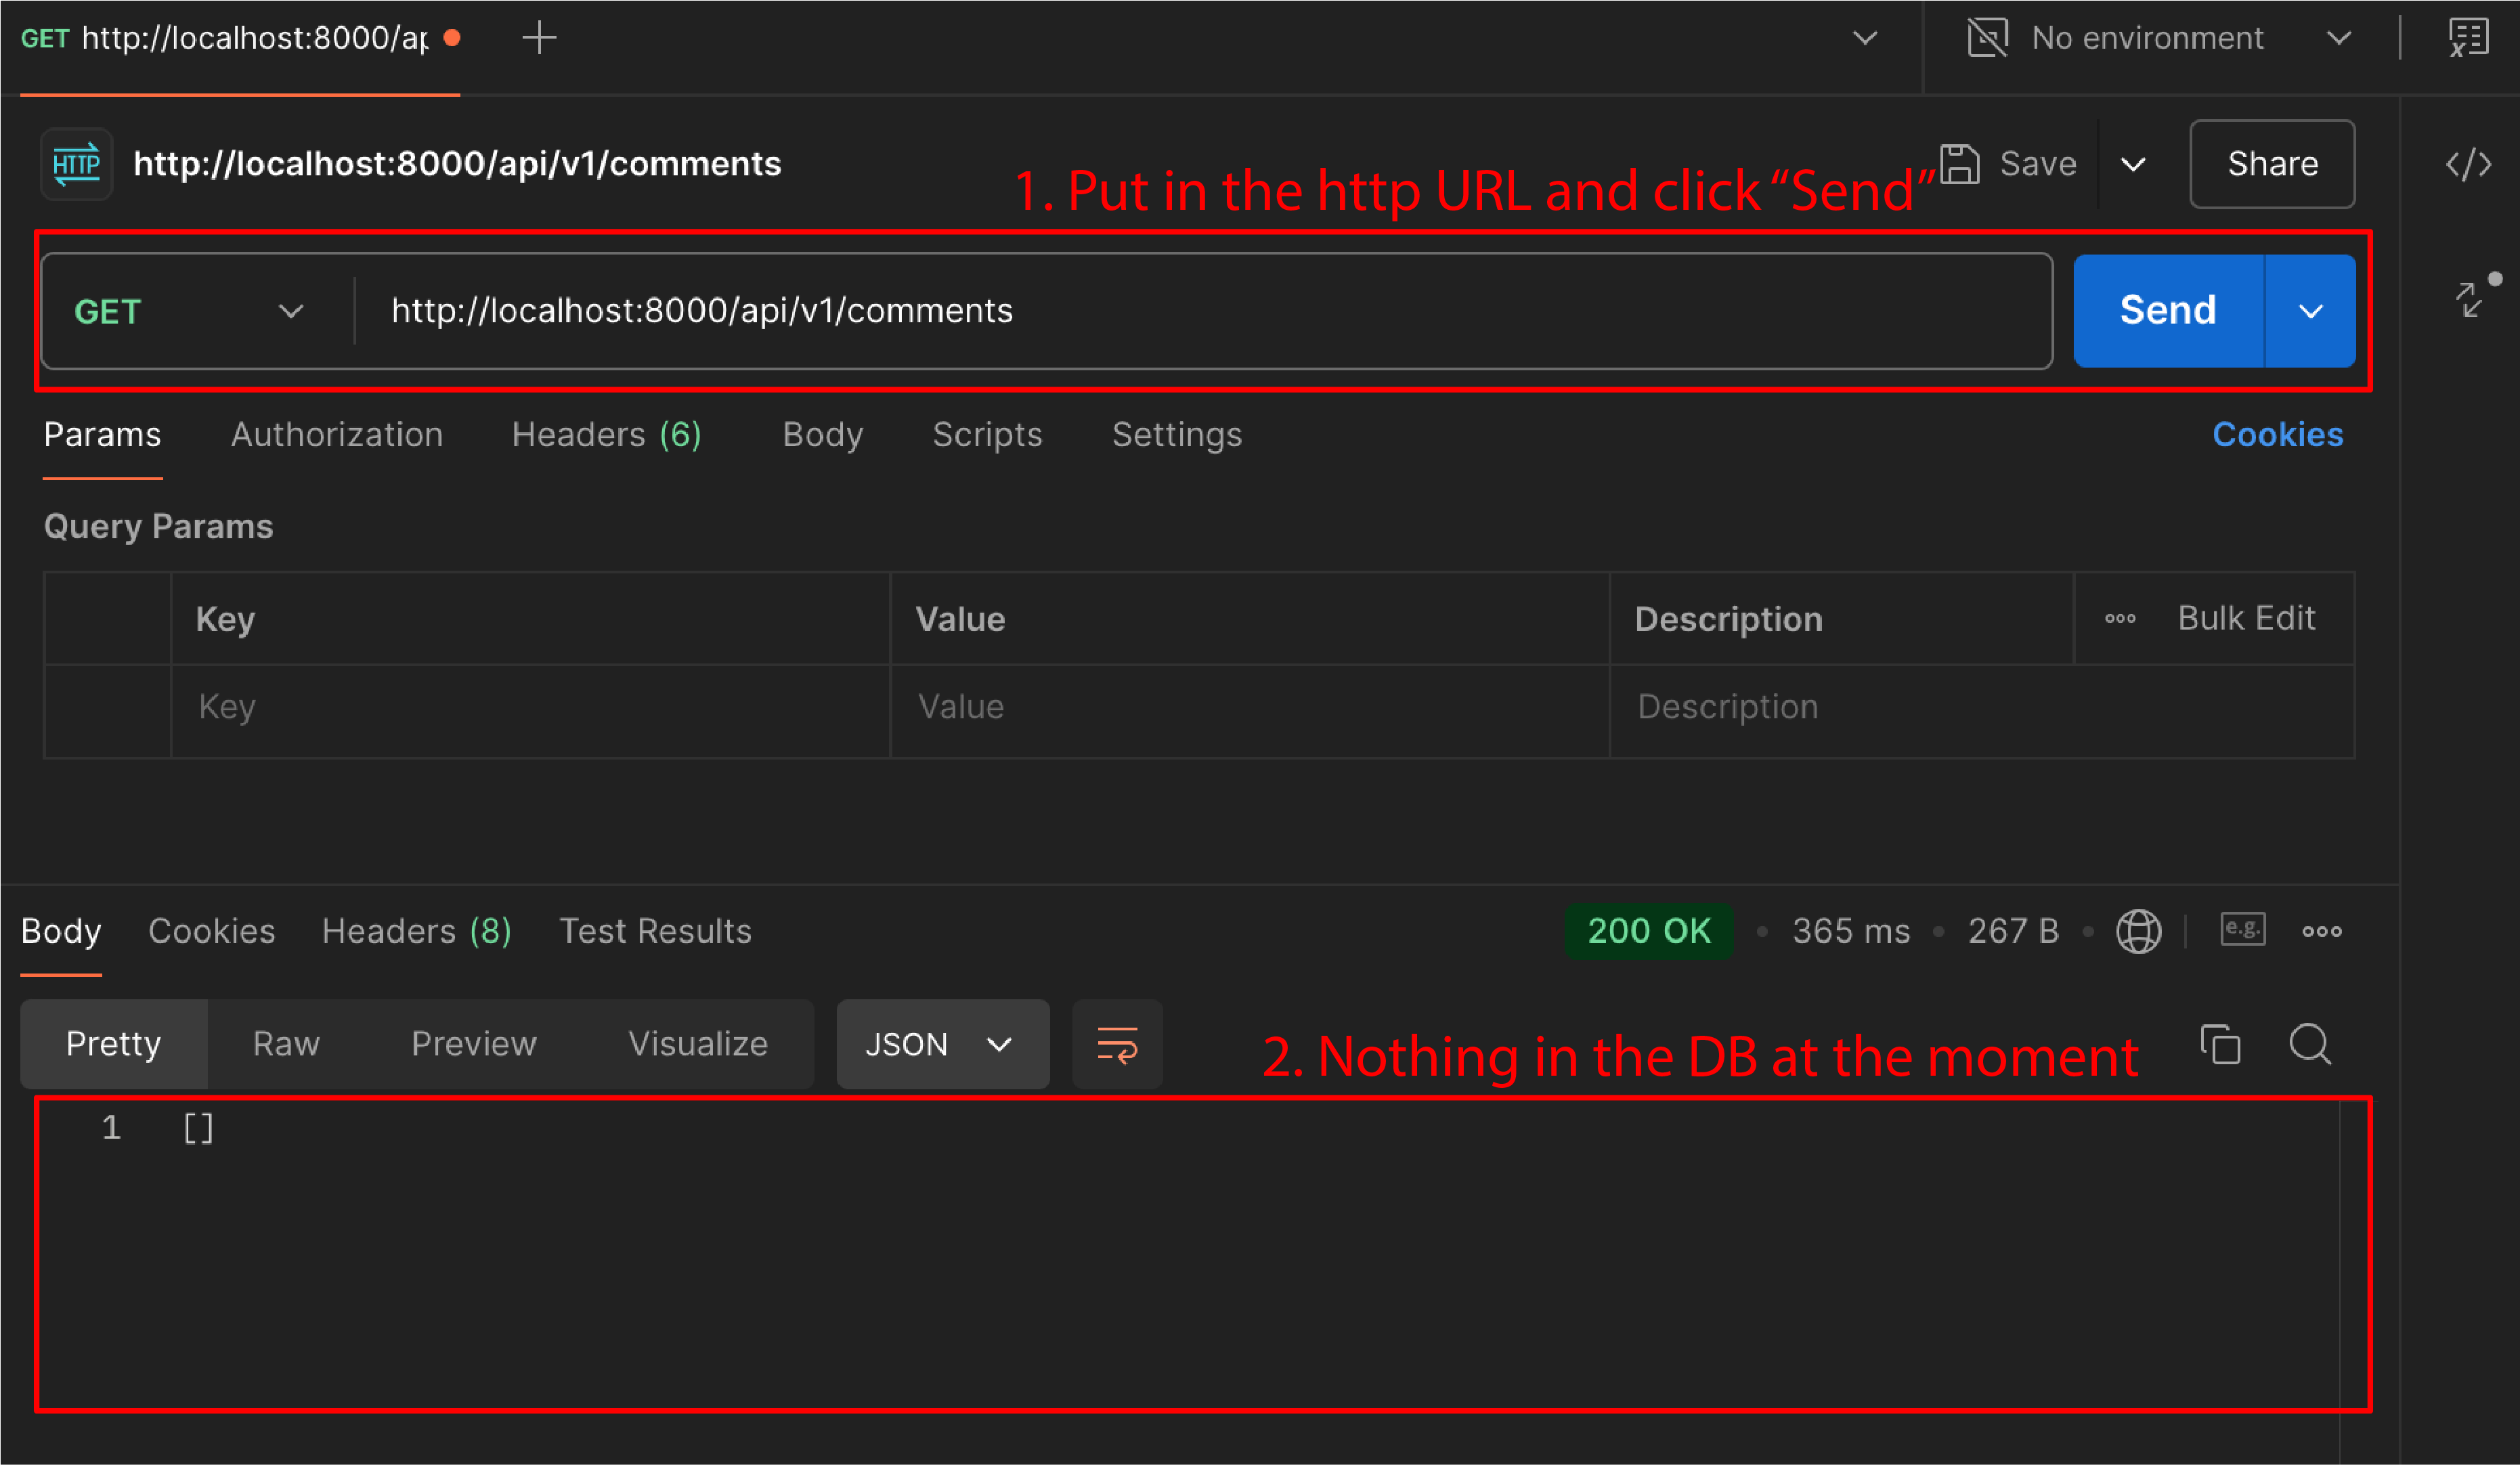
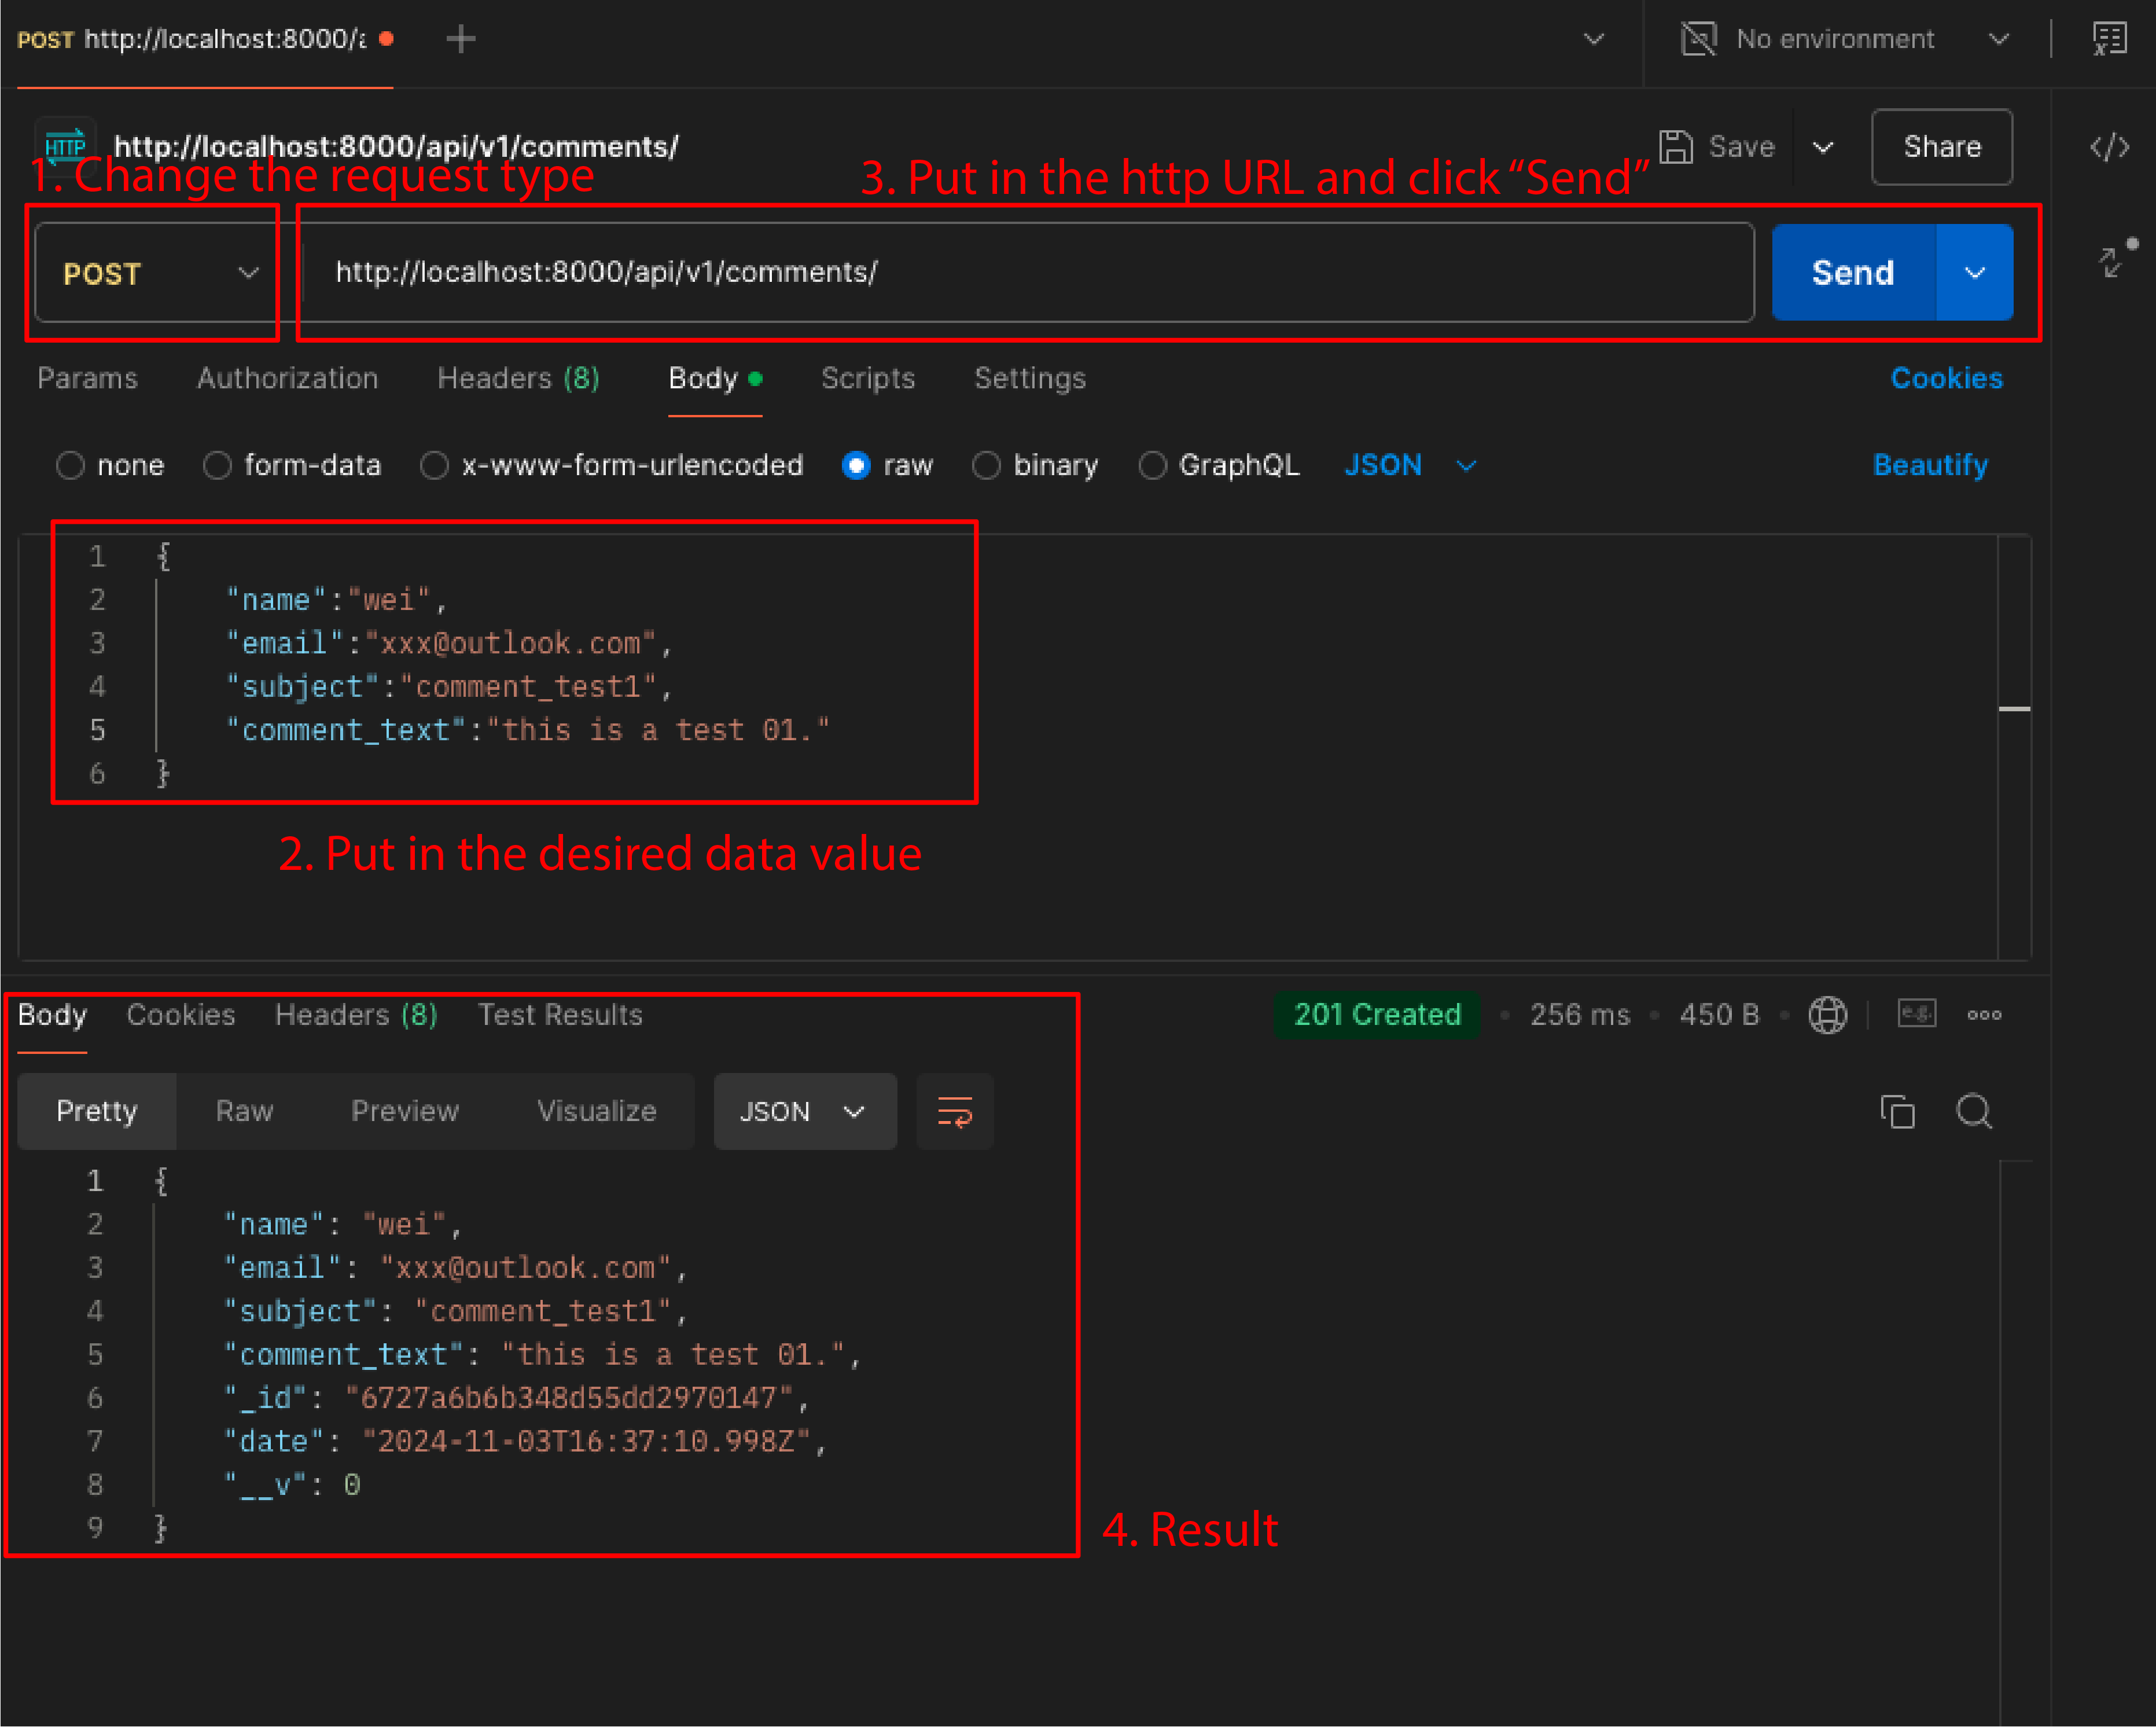
Using Postman to checking if the data has been successfully stored, updated, added in or deleted at MongoDB Portal.
- GET the whole data collection in the MongoDB cluster.
- POST / Adding various strings of new data to the collection based on the data model schema that has been setup.
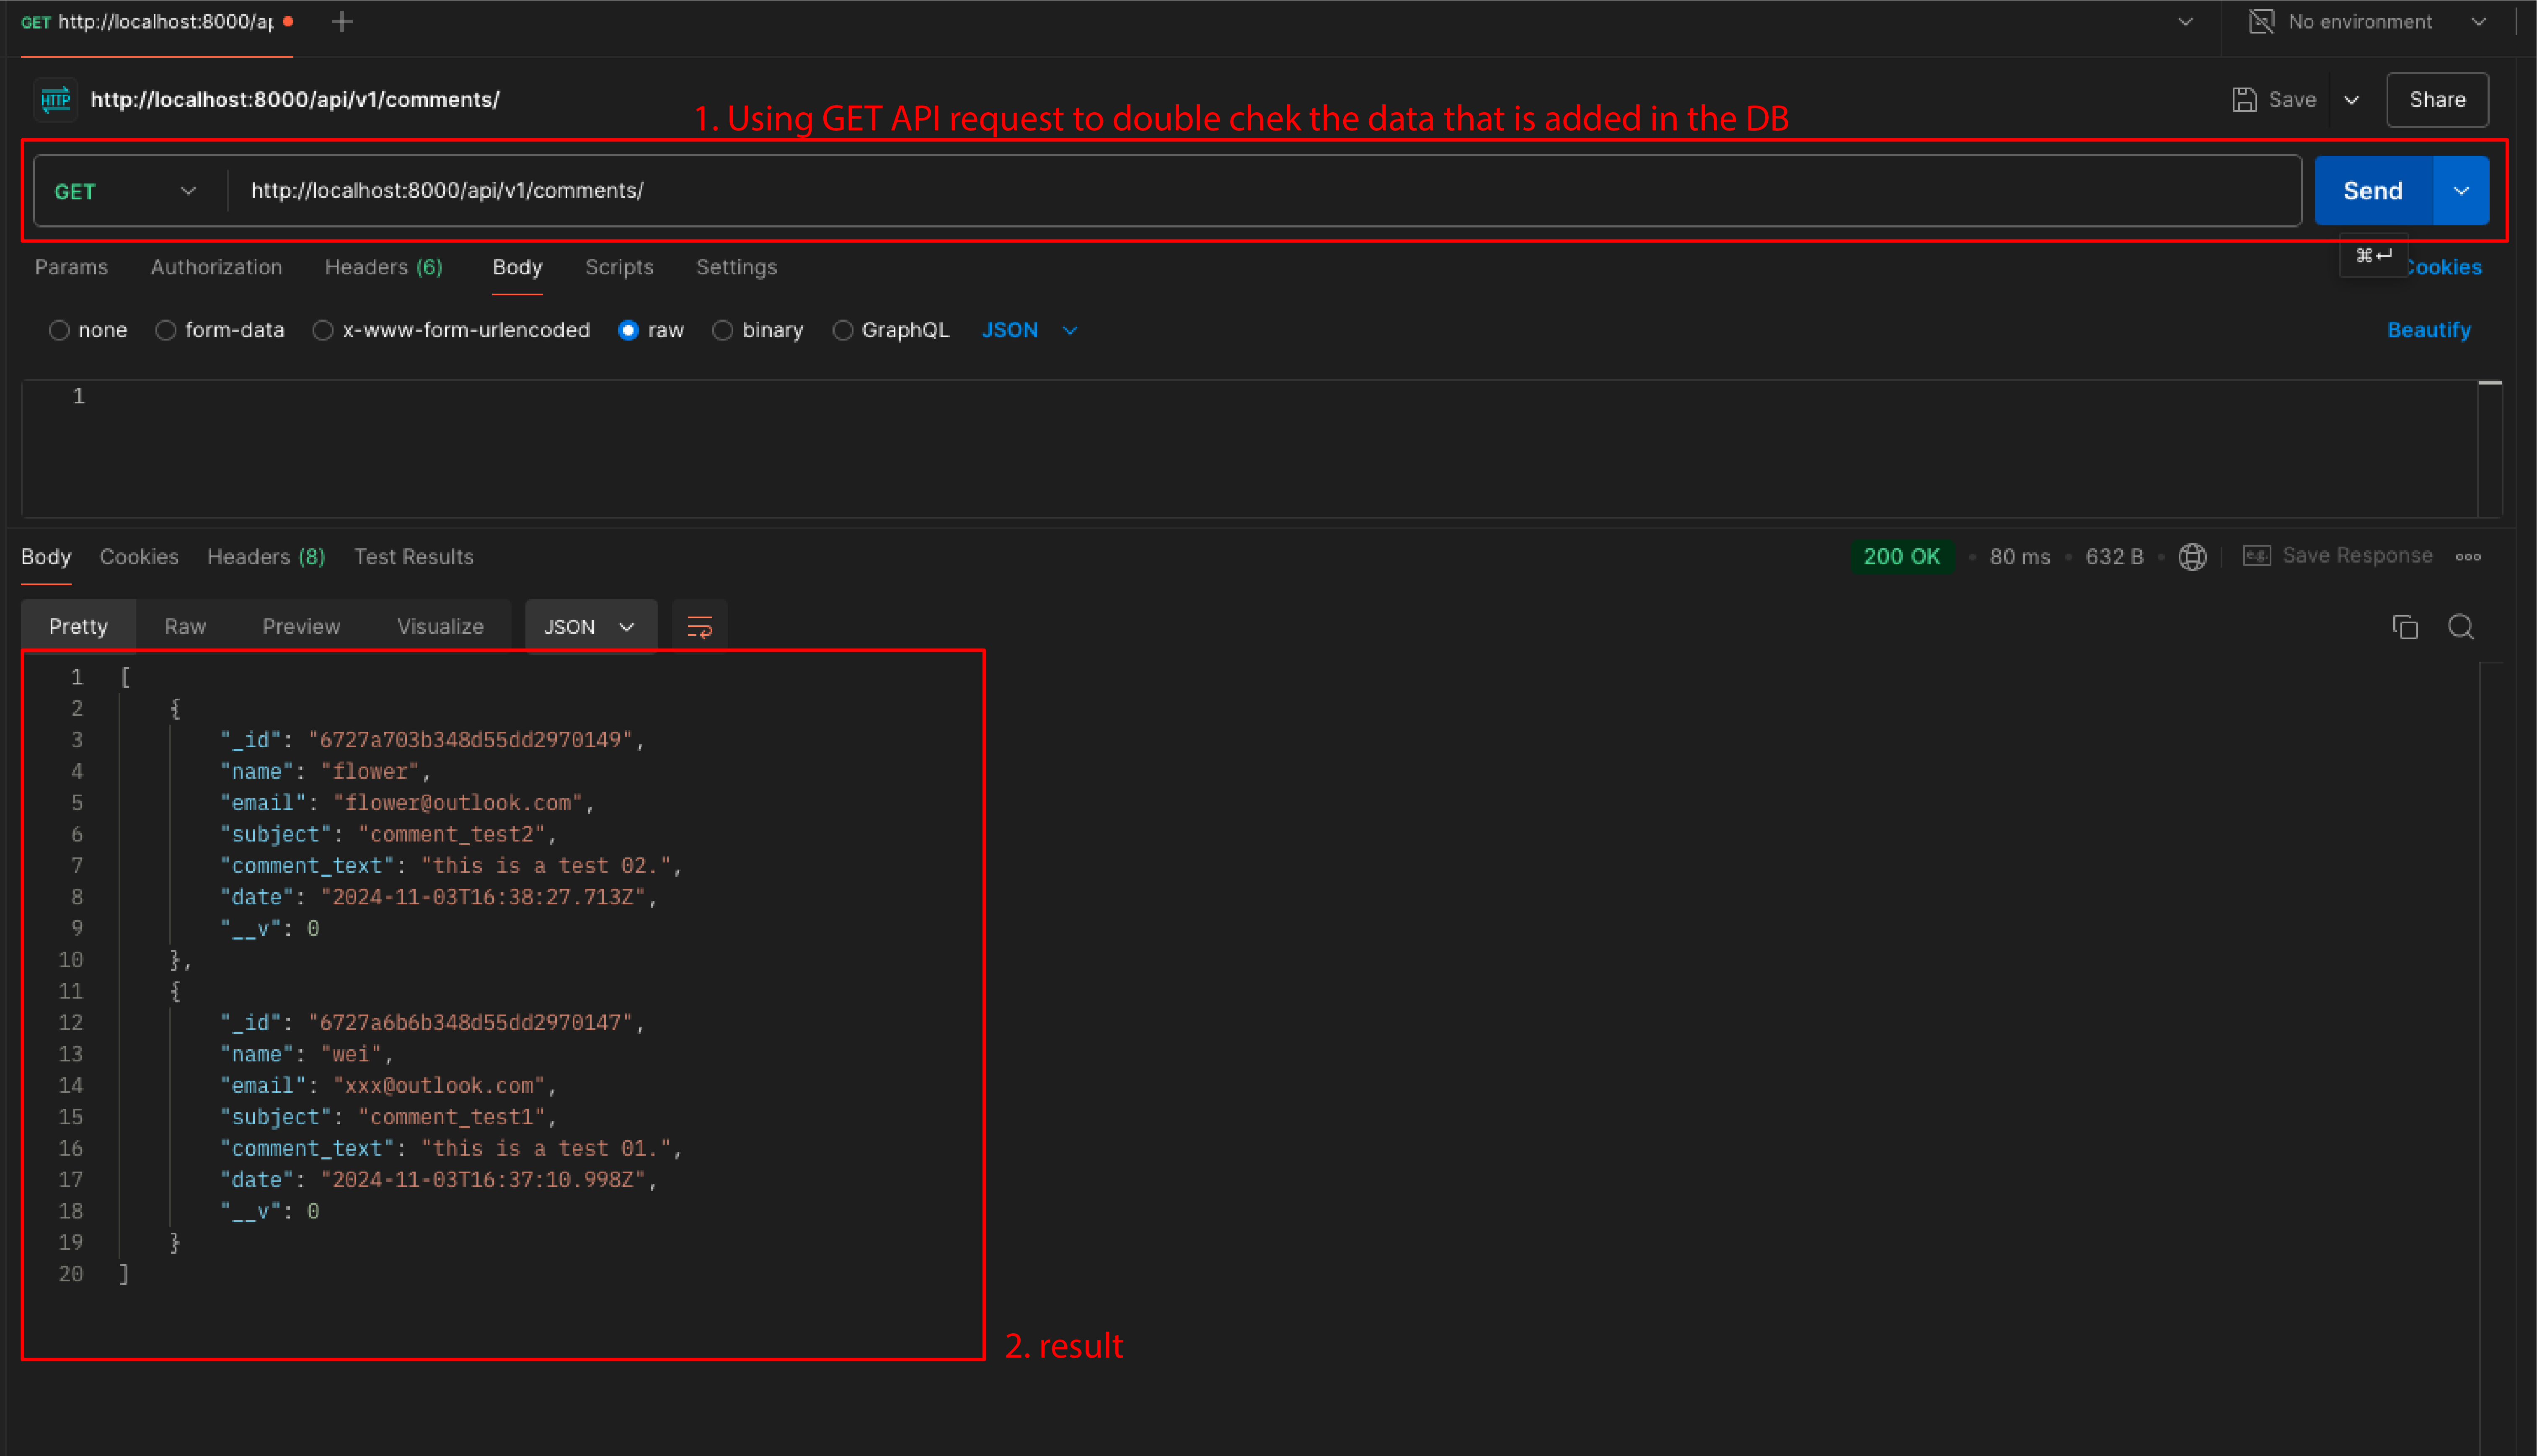
- GET + data ID/ Retrieving single string of data from the collection using ObjectID as the reference.
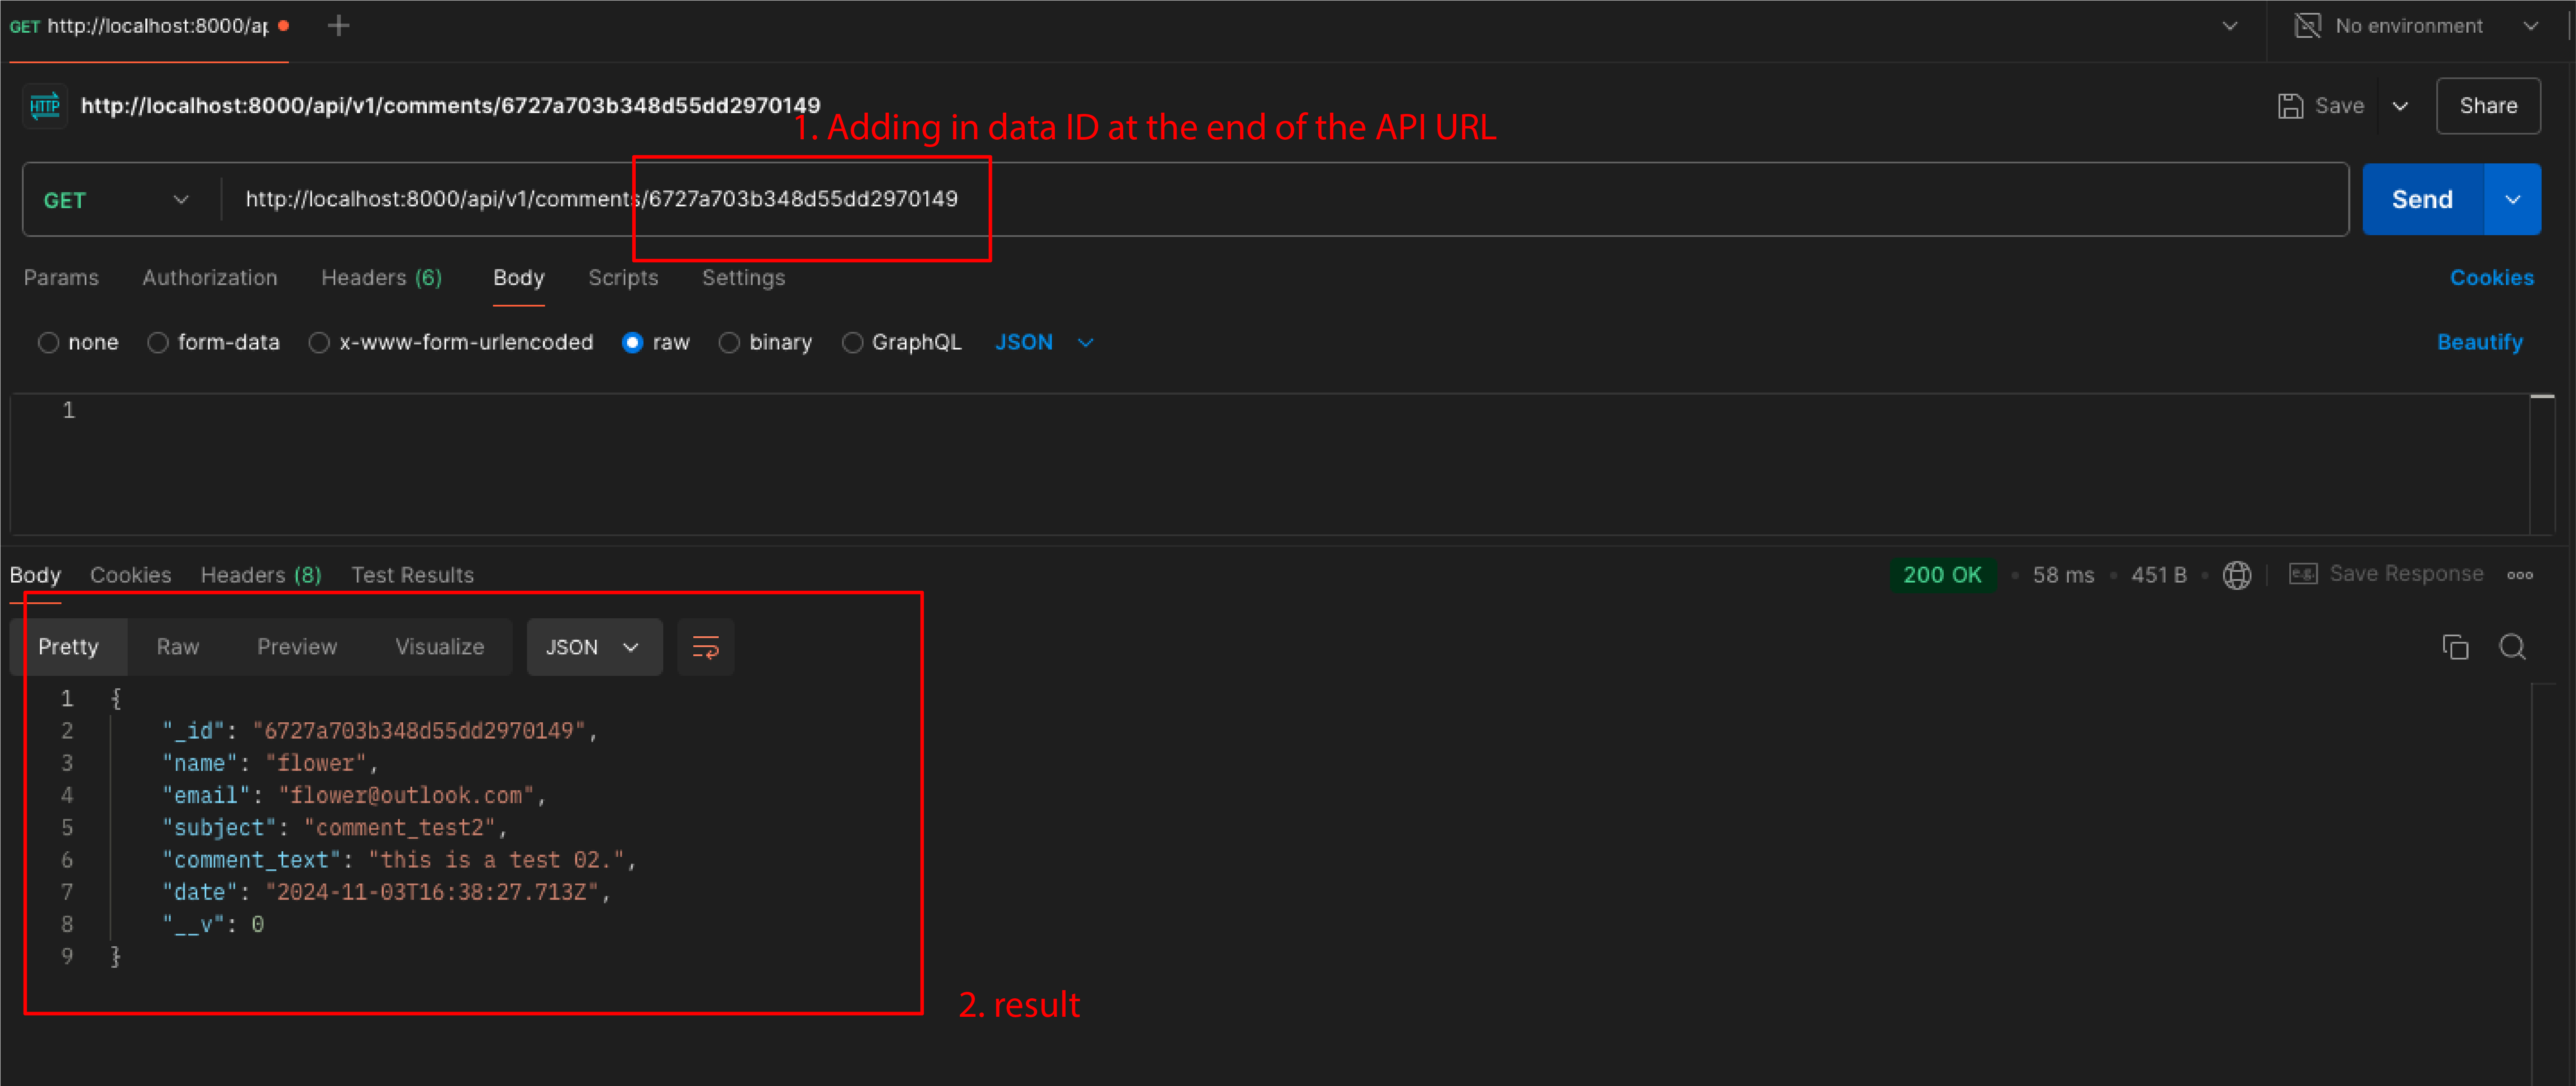
- PUT + data ID/ Updating single string of data from the collection using ObjectID as the reference.
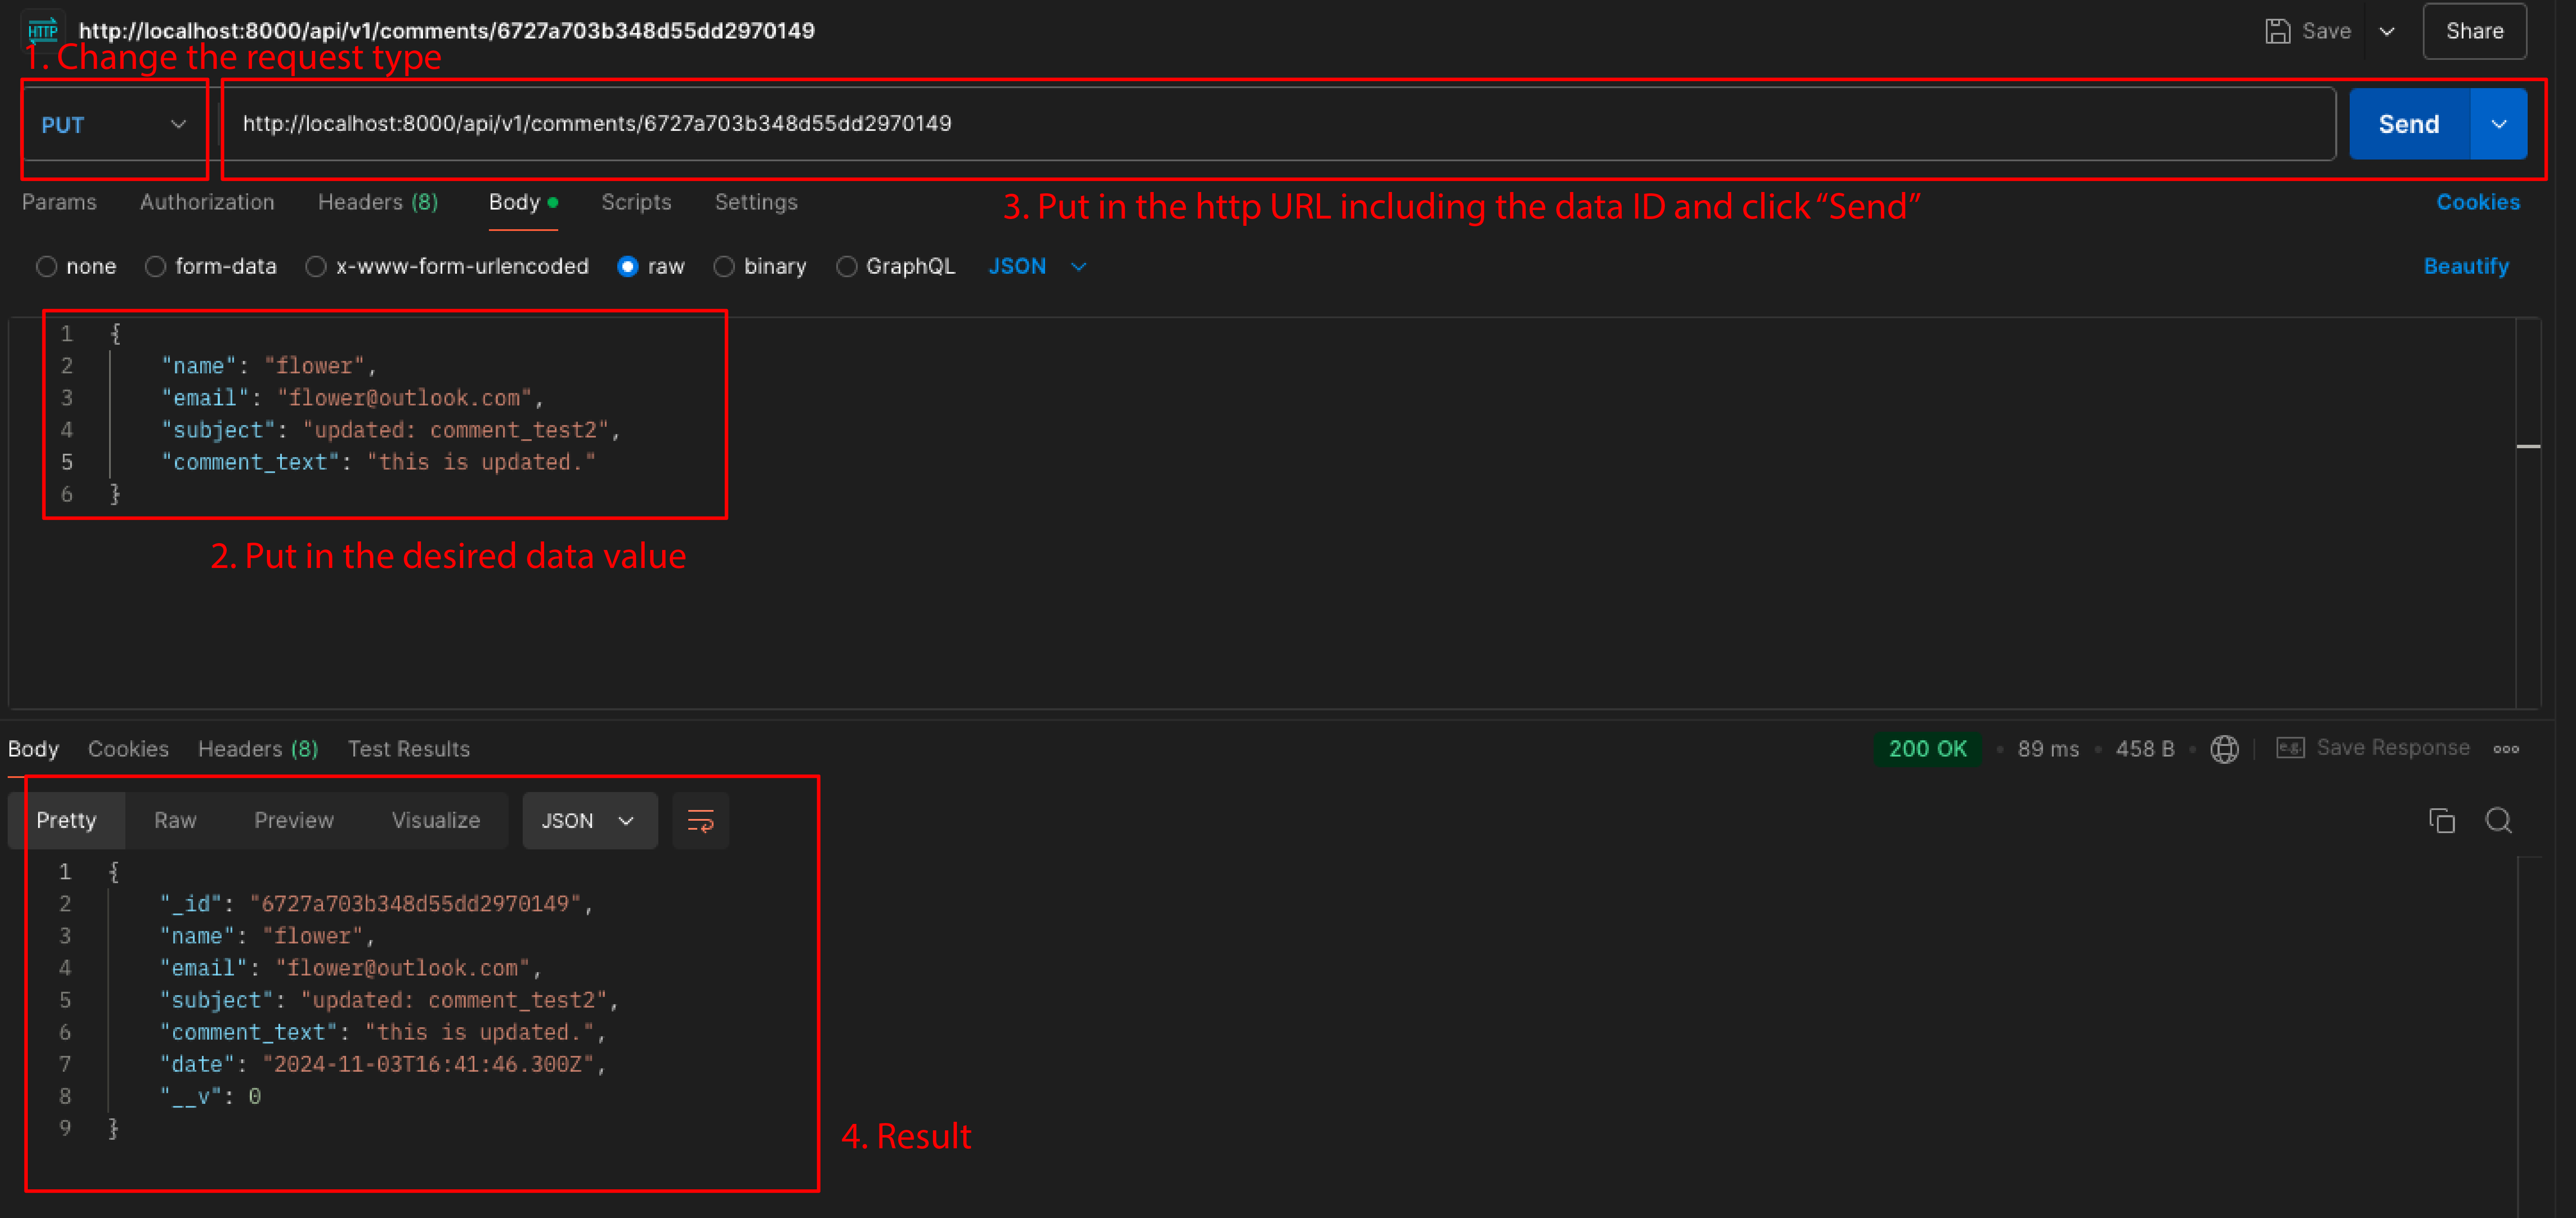
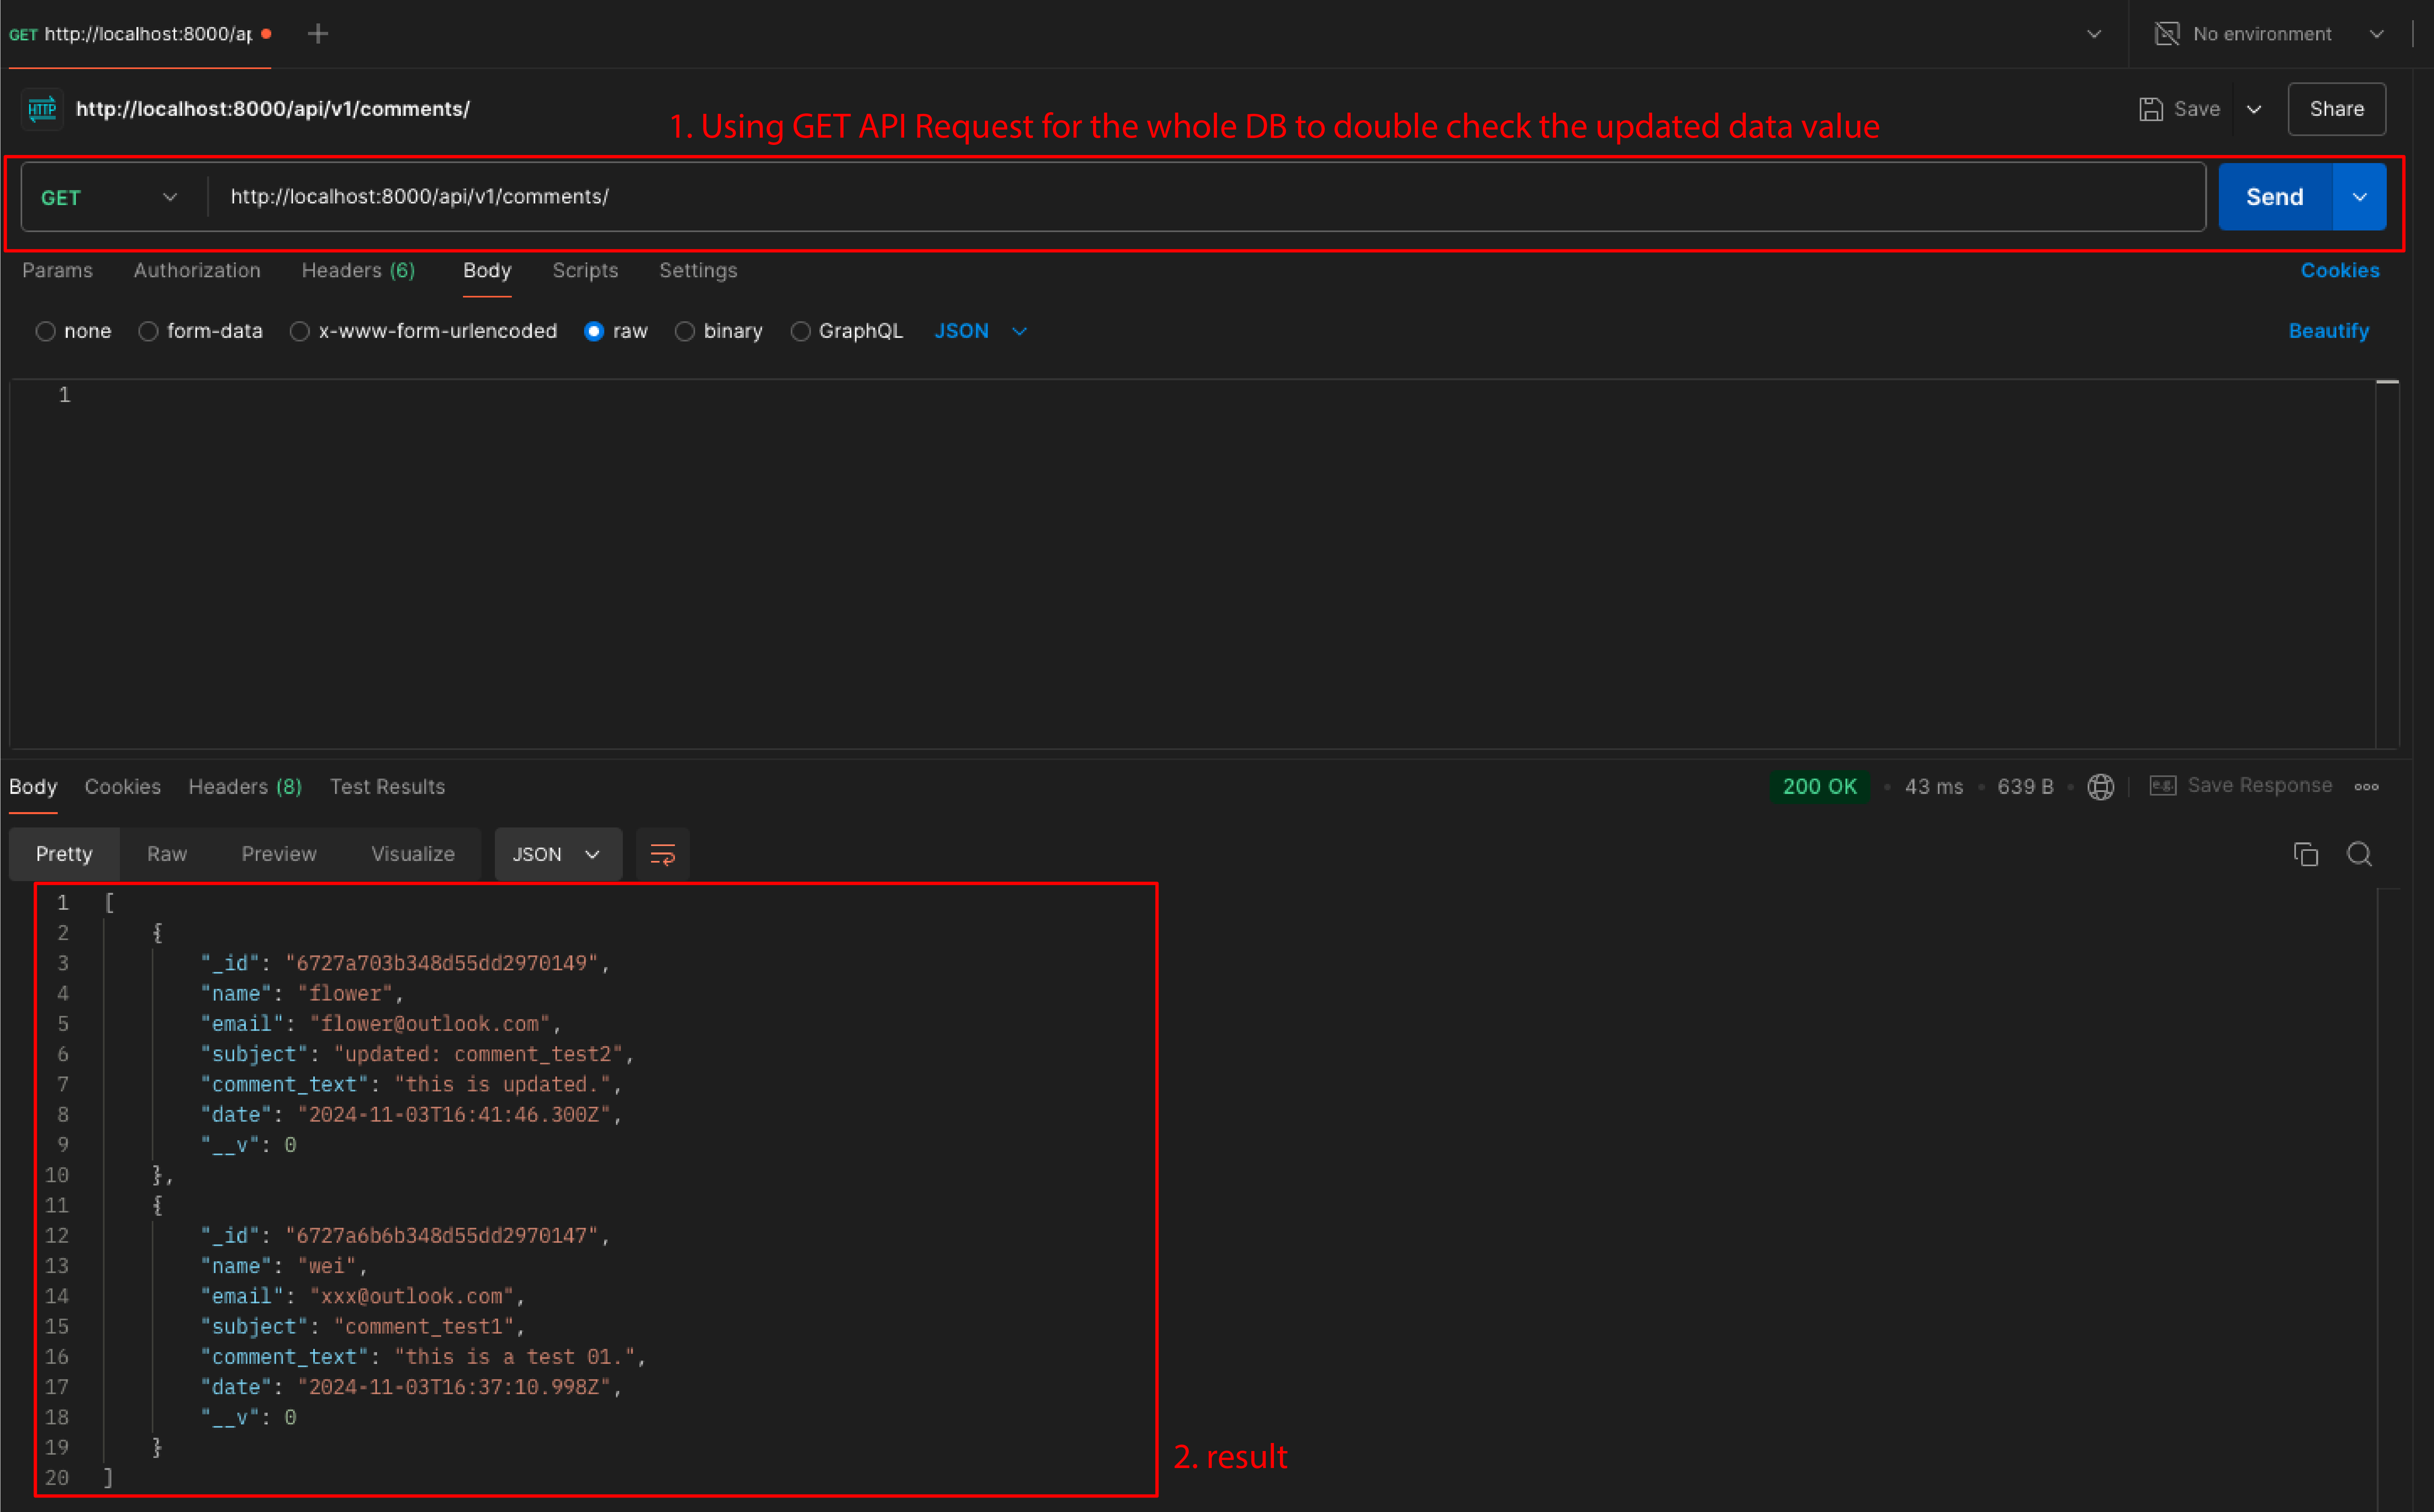
- DELETE + data ID/ Deleting single string of data from the collection using ObjectID as the reference.
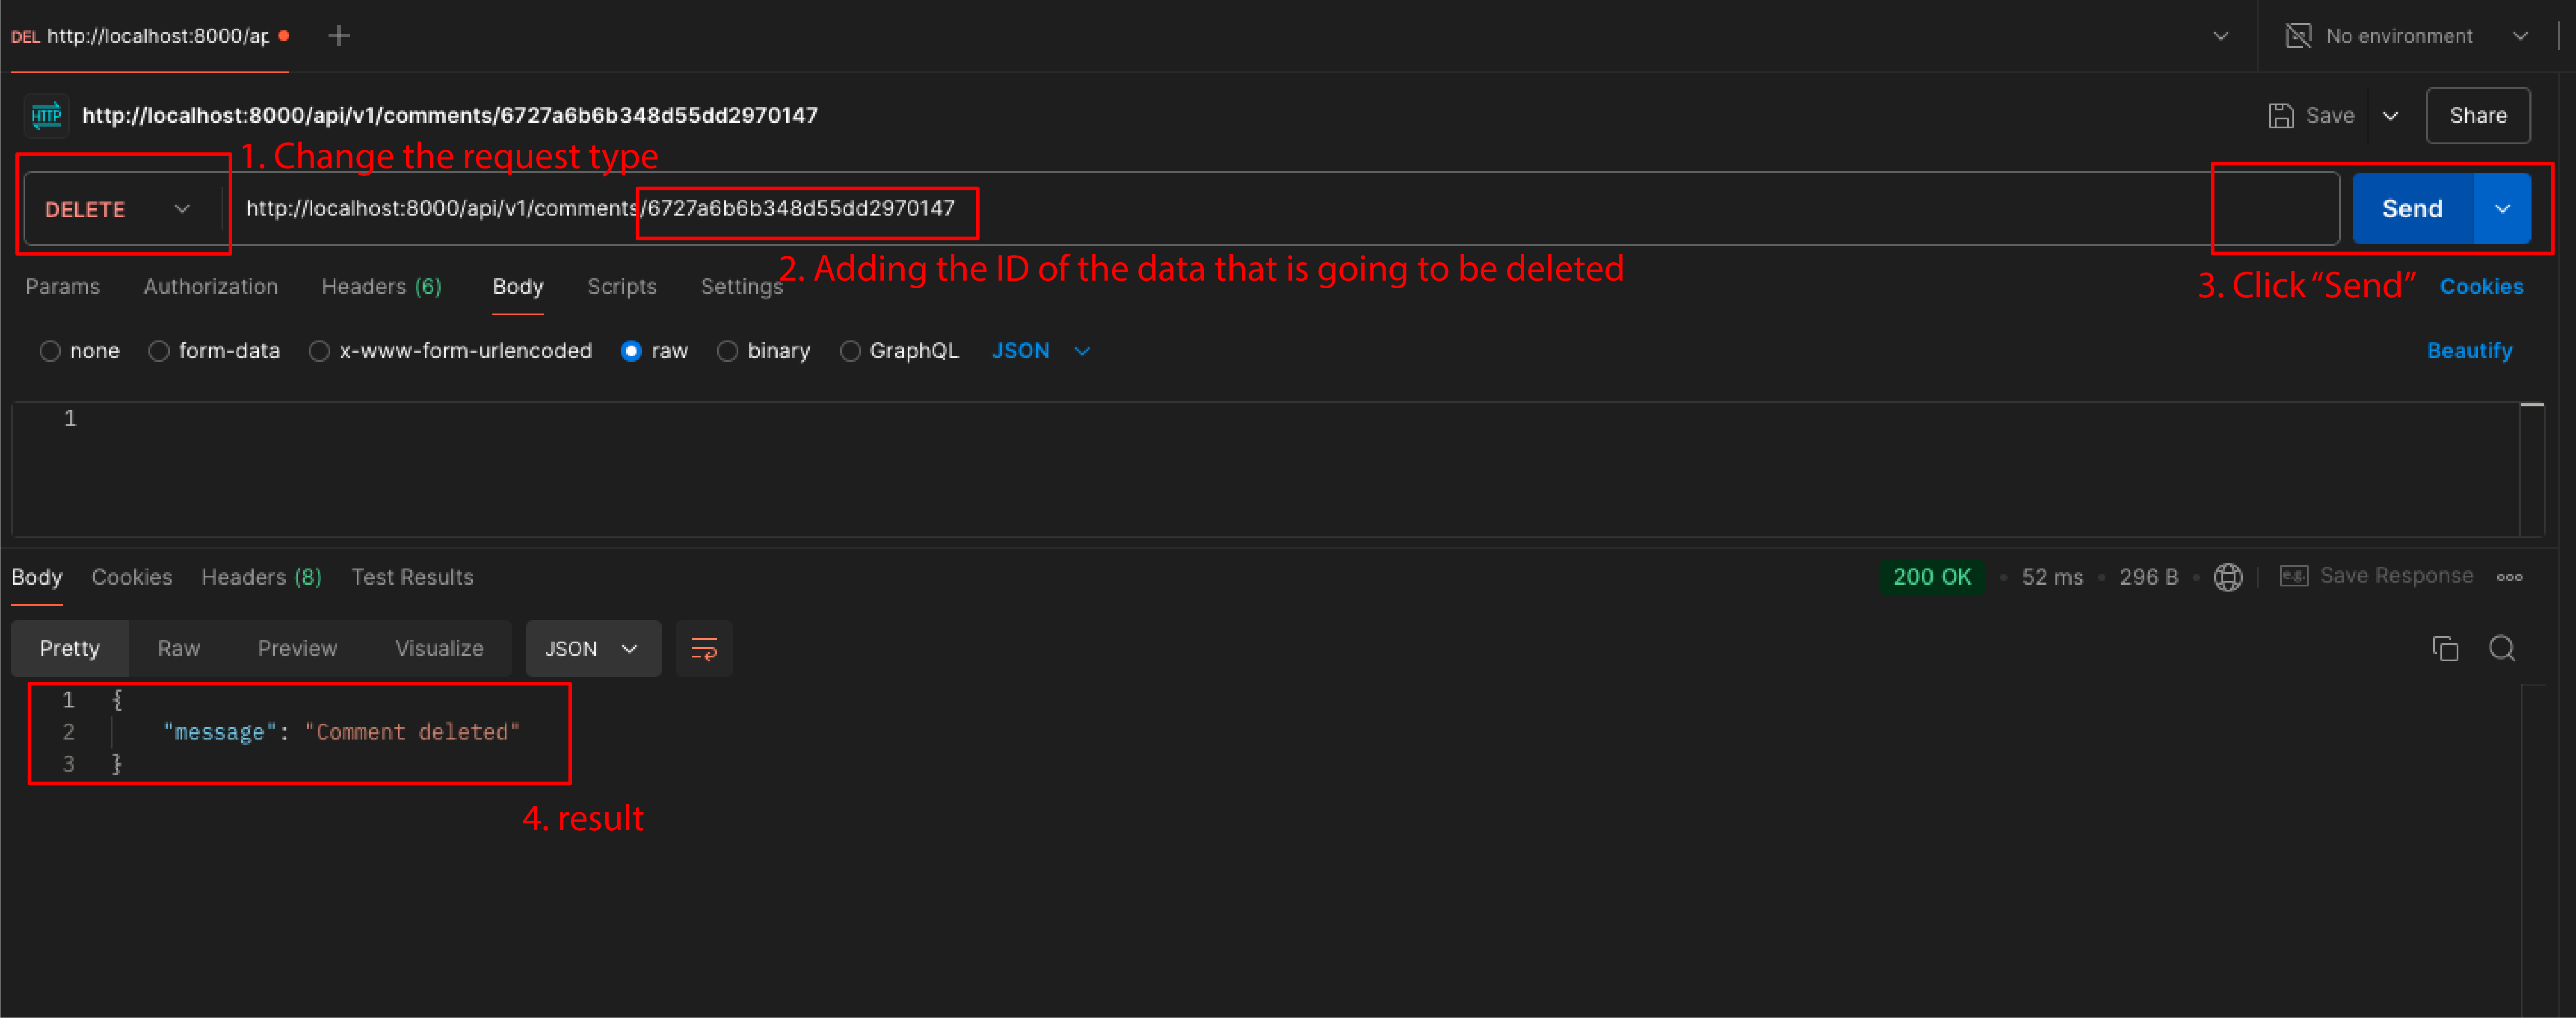
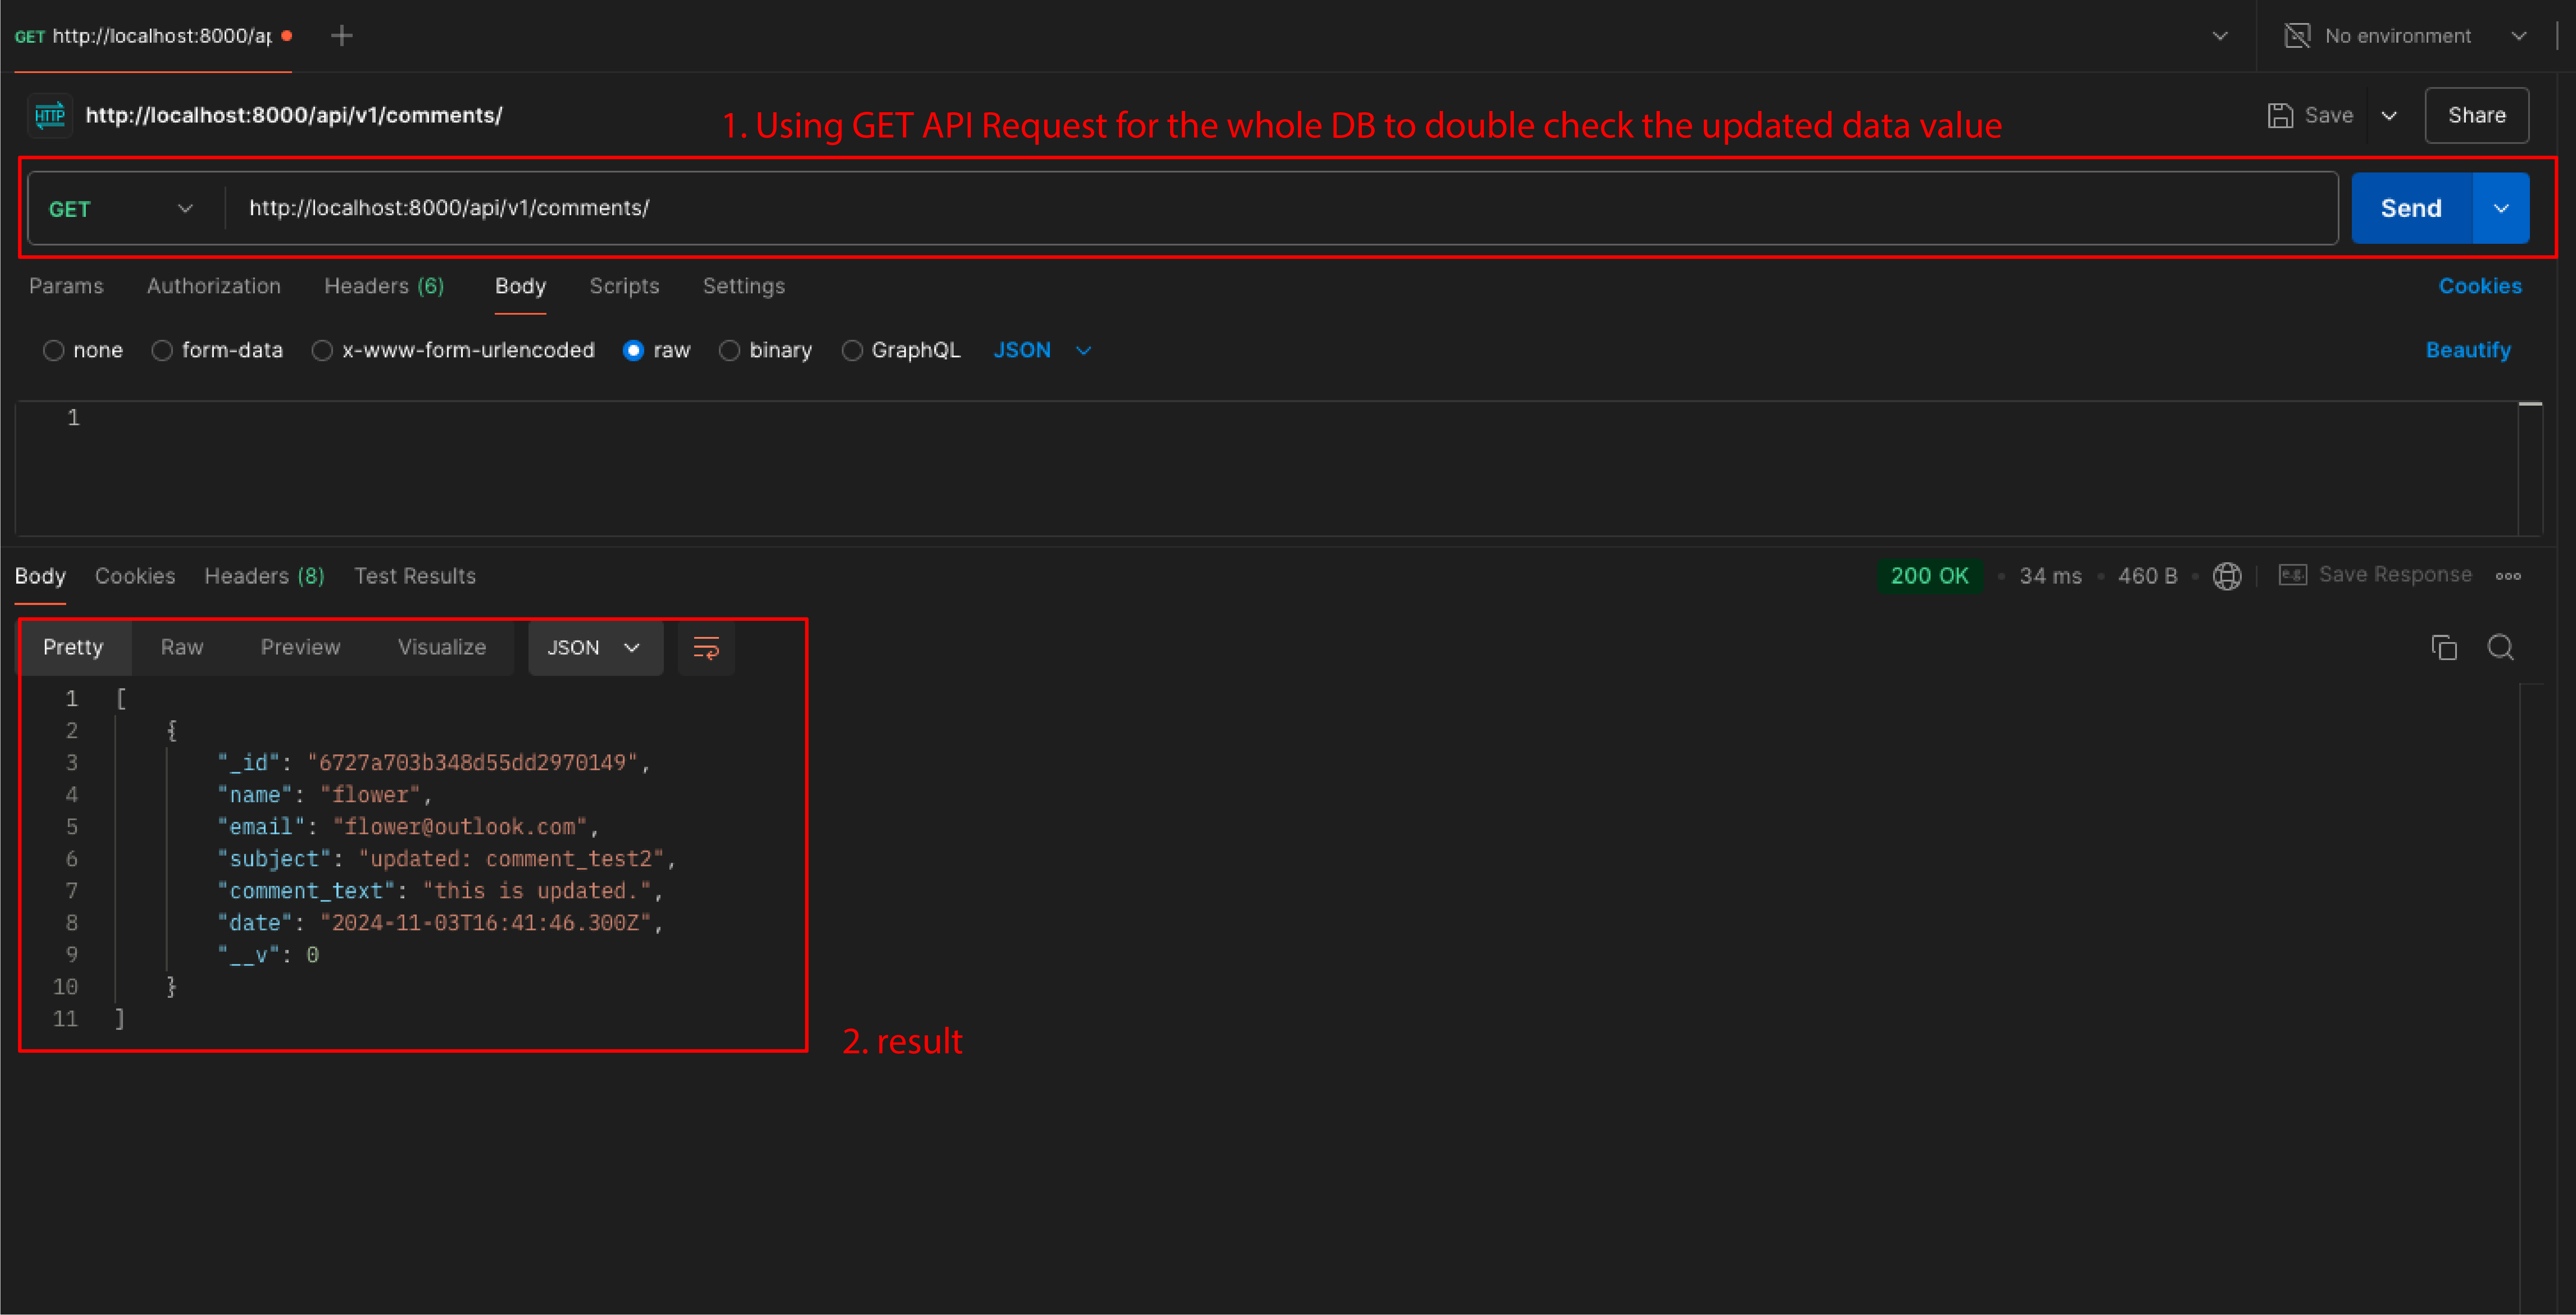
- GET the whole data collection in the MongoDB cluster.
-
5-2. Testing the API with a terminal.
Command line for testing the api functions POST GET PUT DELETE:
- POST
terminal
- GET
terminal
- PUT
terminal
- DELETE
terminal
- POST
💡 Please refer to my GitHub repository to look at the full code.
troubleshoot Notes
Issue 01 | [ERR_MODULE_NOT_FOUND]
Error:
Error [ERR_MODULE_NOT_FOUND]: Cannot find package 'mongoose' imported
Fix:
Installing the package in the root directory of the local machine. Here are the steps:
-
Run the command line
terminal
-
Run the following command line if npm needs to be updated. Replace
version of npmwith the latest LTS version.terminal
- Run the following steps if the node.js version installed in the local machine needs to be updated.
-
Install
nvm(if not already installed):terminal
-
Load
nvminto your shell session:terminal
-
List available Node.js versions:
terminal
-
Install a specific version of Node.js (e.g., version 18.0.0):
terminal
-
Use the installed version:
terminal
-
Set the default Node.js version (optional):
terminal
-
Install
Issue 02 | Connection to MongoDB Failed
Error:
Could not connect to any servers in your MongoDB Atlas cluster. One common reason is that you're trying to access the database from an IP that isn't whitelisted. Make sure your current IP address is on your Atlas cluster's IP whitelist: https://www.mongodb.com/docs/atlas/security-whitelist/
Potential Fix 01:
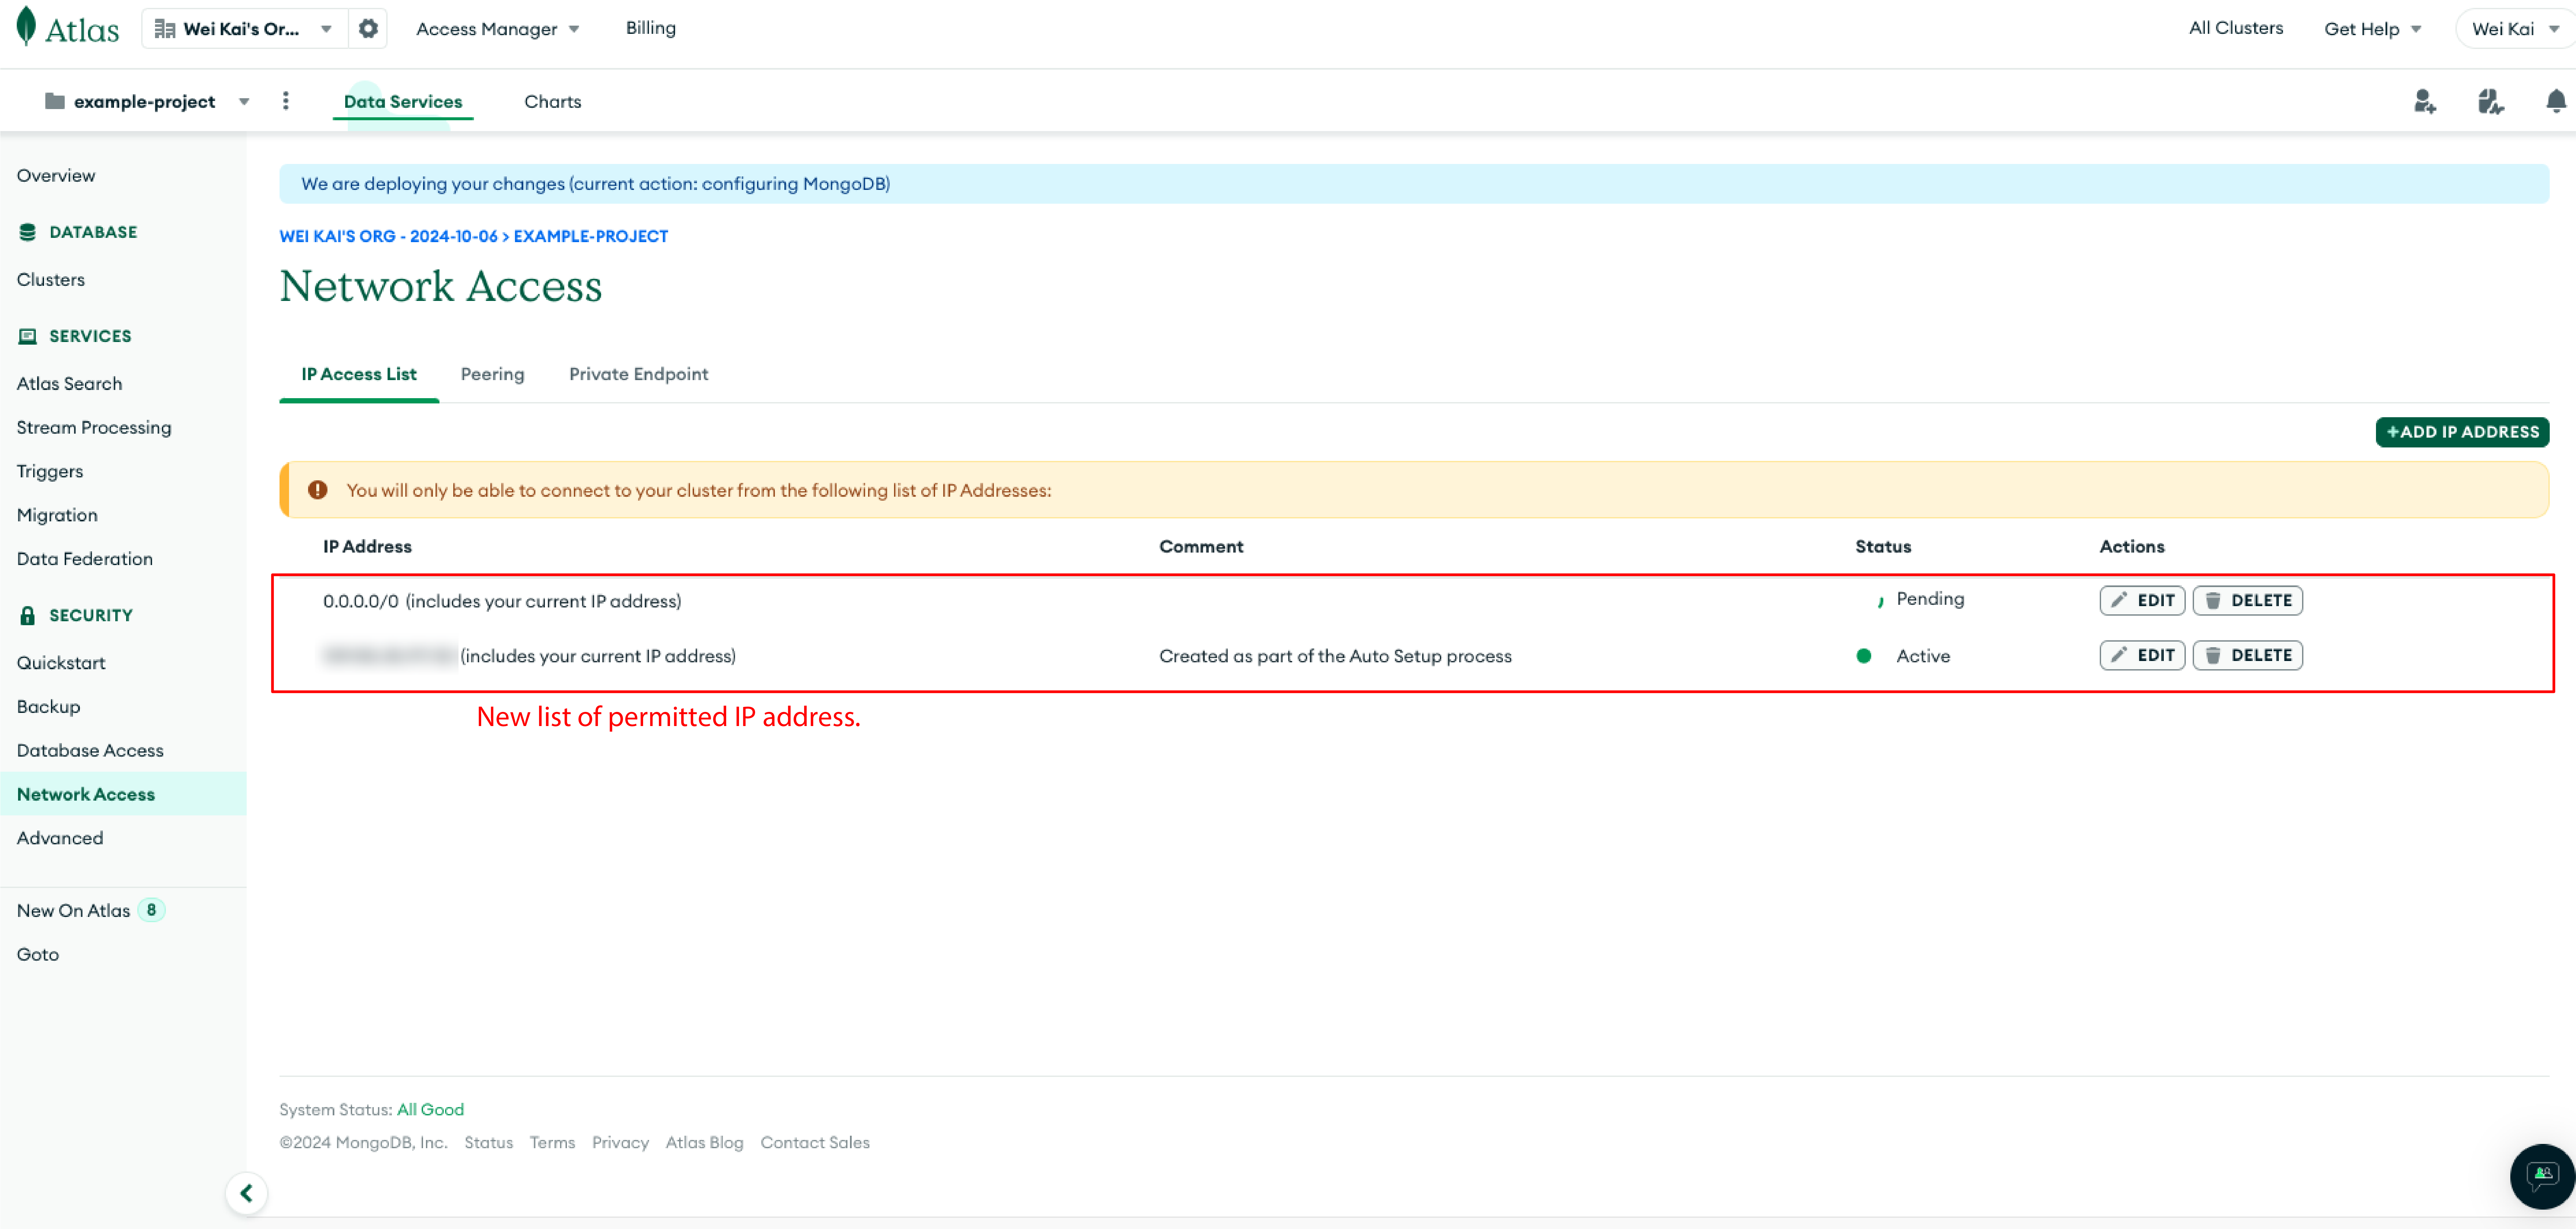
Including the IP address into the ‘Network Access List’
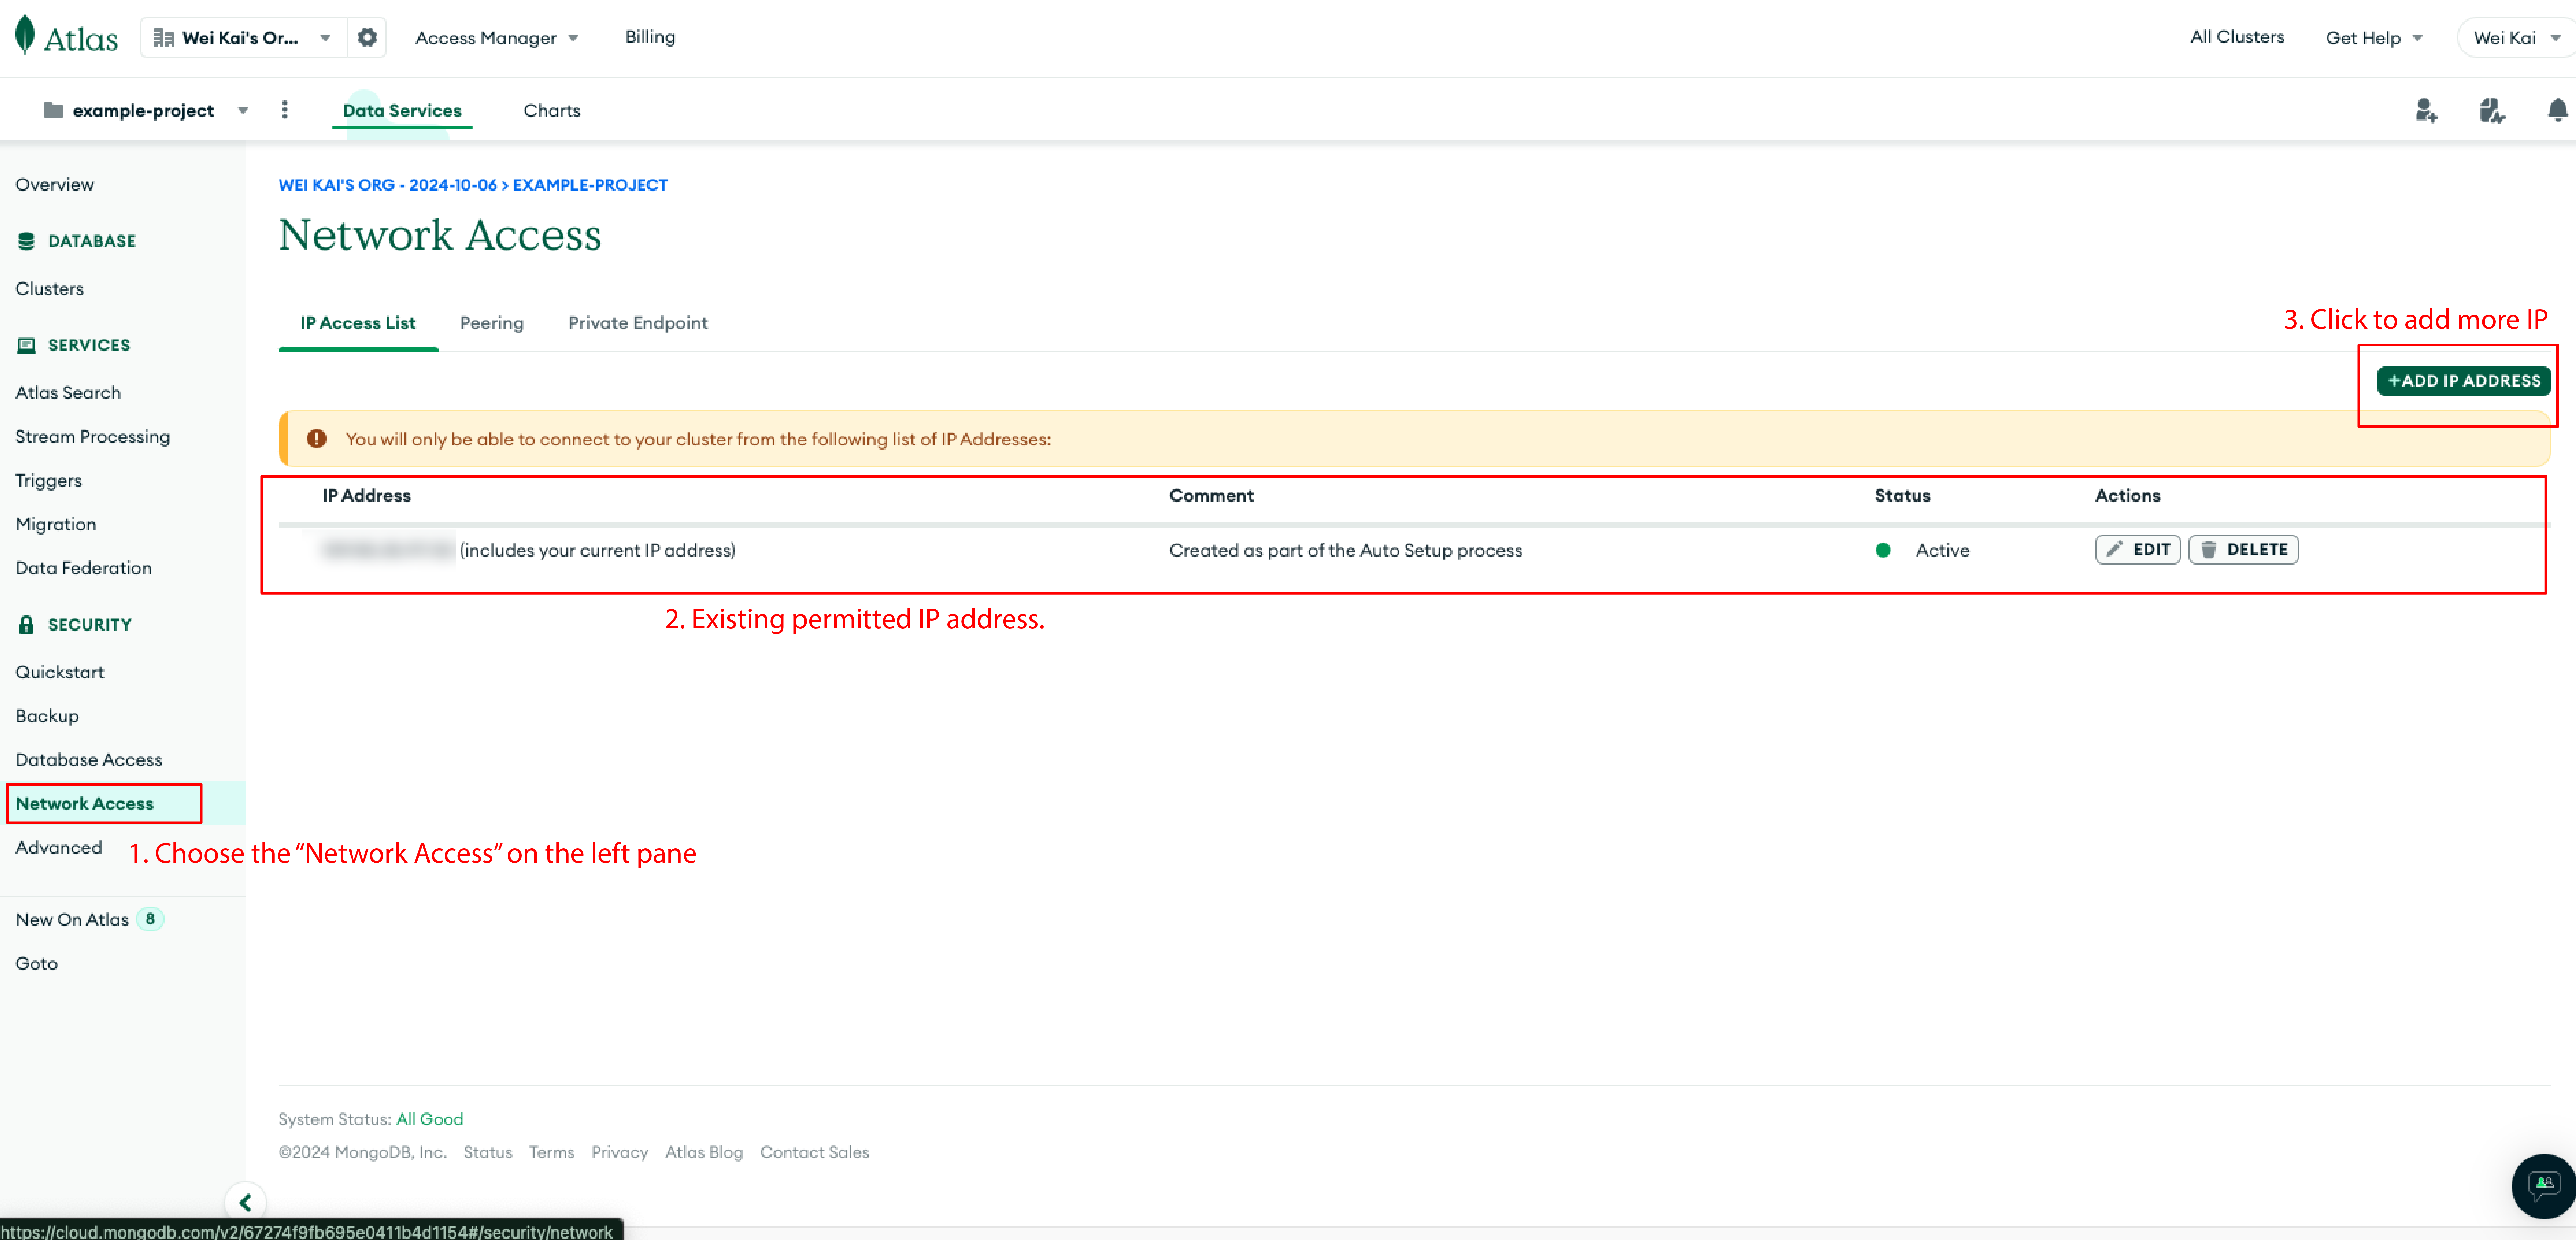
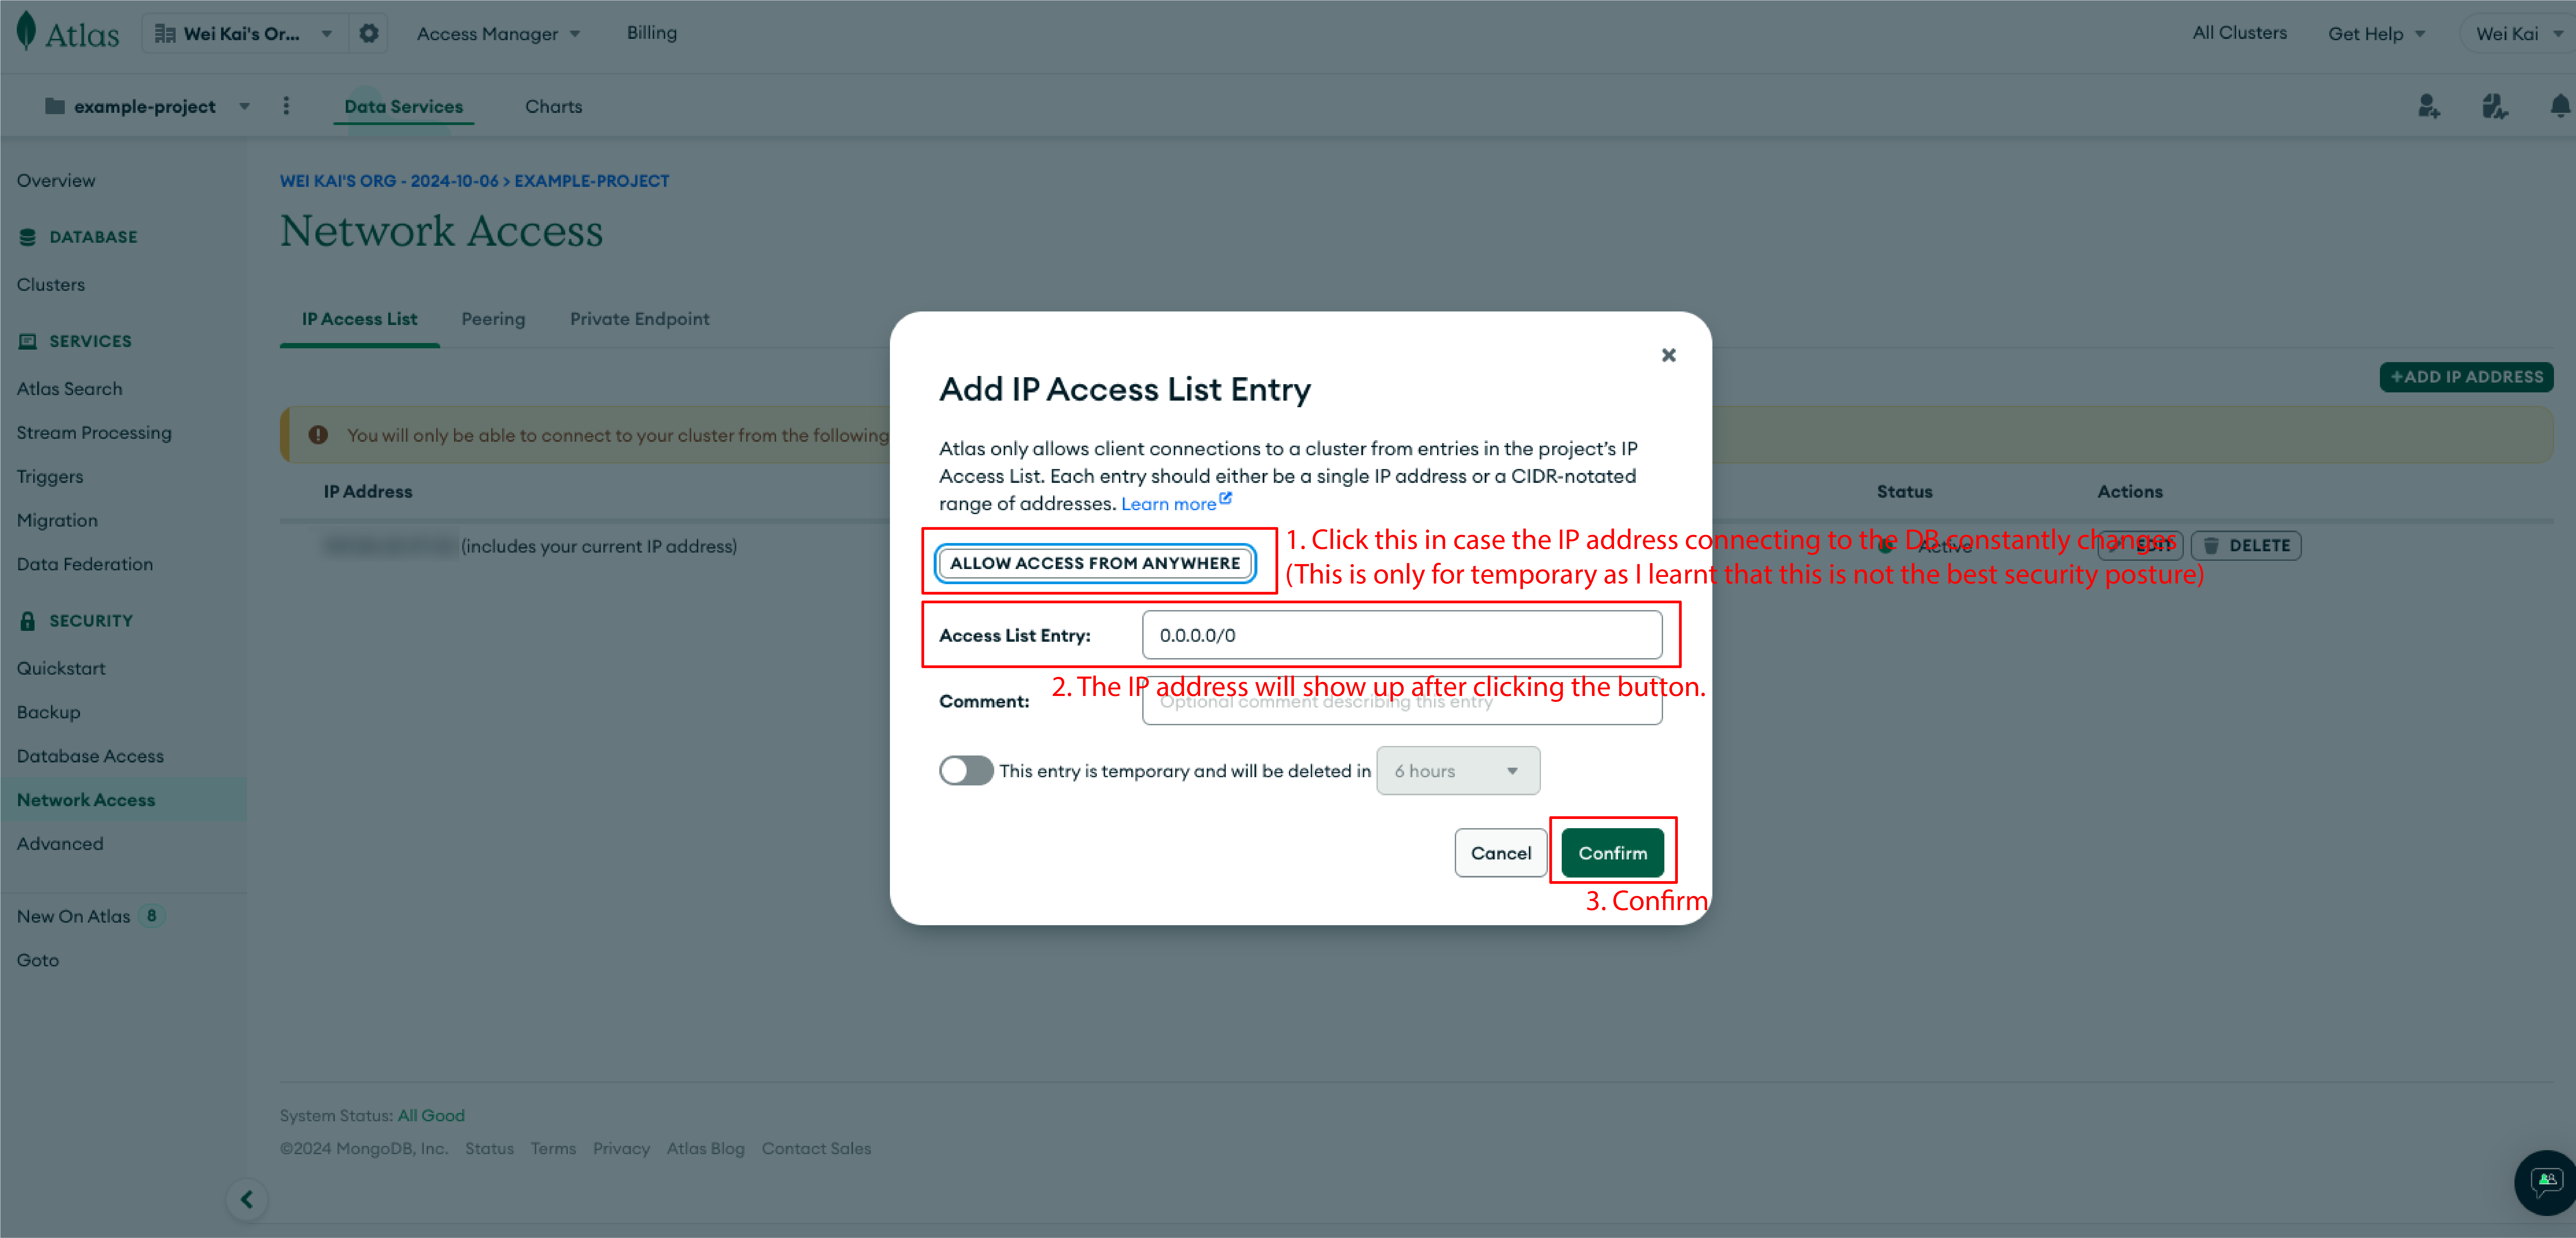
Potential Fix 02:
Updating the version of Node.js to v.22.11.01, the latest LTS version.
-
Using the intalling-via-nvm steps mentioned in the Troubleshooting Issue 1 to install the laster LTS version of Node.js and use the follwing command line to ask the system to use the version after the installation.
terminal
-
Double check if the current default version is correct.
terminal
- Run the connection node file again.
terminal